Switching from Gmail to ProtonMail on Mac
Switching from Gmail to ProtonMail on Mac without losing any emails. Import, redirect, contacts, native app or Bridge, the whole process step-by-step.
Introduction
July Update 2026. The Hide My Email flaw is unmasking Apple aliases (public disclosure on July 1st, still not fixed). Another argument for sovereign aliases: see the email comparison update.
May Update 2026. Another reason to migrate: Proton Mail now offers post-quantum encryption for new emails, included for free. Your communications remain unreadable even by a future quantum computer that stored today’s encrypted versions. Details in the radar.
Gmail is like that roommate apartment where the landlord reads your mail. Not maliciously, just systematically. Since 2004. To show you ads.
Switching to Proton Mail is getting your keys back. Emails between Proton users are end-to-end encrypted, keys generated on your devices, Proton has no technical access. For incoming emails from outside (like from Gmail), Proton encrypts them upon receipt with your public key, and only you can decrypt them. In both cases, Proton can’t read your emails, even if legally compelled.
The migration itself is simpler than it sounds. Allow 30 minutes for a light account, 1 to 2 hours if you have years of Gmail archives. At the end, you’ll have all your old emails in Proton, your contacts imported, and Gmail will automatically forward new messages to your Proton box during the transition.
Read: Apple Mail vs Gmail vs Proton Mail: The Honest Comparison to understand why Proton Mail is architecturally different.
Before You Begin
What you’ll need:
- A Mac running macOS 12 Monterey or later
- An active Gmail account with IMAP access enabled (enabled by default on most accounts)
- A Proton Mail account (the free plan is enough to test; if you have more than 1GB of emails, a paid plan is necessary, see Step 1)
- Between 30 minutes and 2 hours depending on your mail volume
What will change:
- Your emails will now pass through Proton’s servers (Switzerland), encrypted on the server side
- You’ll access your mailbox through the Proton Mail app on Mac (paid, 14-day free trial available) or through the web on mail.proton.me, or through Apple Mail with Proton Bridge (paid plan required for Bridge)
- Your new address will be in
@proton.me(or@protonmail.com)
What won’t change right away:
- Your existing emails on Gmail will remain there until you import them
- Your newsletter subscriptions and registered accounts will keep your old Gmail address until you update them manually
- You can keep Gmail active in parallel throughout the transition
The operation is entirely reversible. You won’t delete anything at Google at this stage.
Step 1: Create Your Proton Mail Account
Go to proton.me/mail and sign up.
Free plan: 1 address @proton.me, 500MB of base storage (expandable to 1GB by completing the Proton startup checklist), web and mobile app access. Easy Switch is available on the free plan, but the available storage acts as a ceiling for import: with 1GB, you can import about 1GB of old emails.
Plus Mail plan: 15GB of storage, 10 addresses, custom domain support, access to Proton Bridge if you want to use Apple Mail, and SimpleLogin included (an email alias service, more on that in Step 6). Price: $3.99/month (annual billing).
If your Gmail account exceeds 1GB of archives, you’ll need to upgrade to a higher plan or clean up before migrating.
Tip: You can start on the free plan, import the last 12 months, and upgrade to a higher plan if necessary.
Choose your address carefully. [email protected] for professional use, something shorter for everyday use. You won’t be able to change it later.
Step 2: Import Your Emails from Gmail via Easy Switch
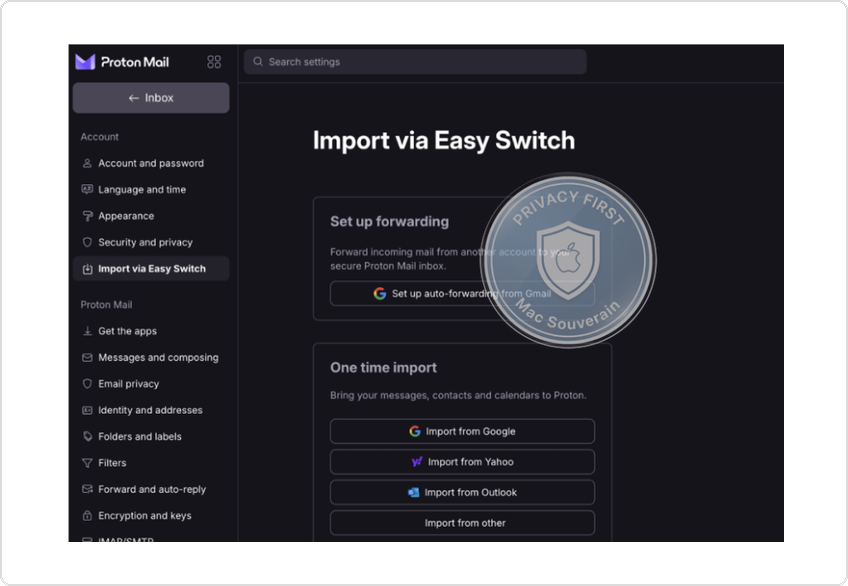
Proton offers a built-in import tool that connects directly to your Gmail account via OAuth, without needing your Gmail password on Proton. Google generates a temporary authorization, Proton uses it to read your mailbox, and that’s it.
In Proton Mail web:
- Go to Settings (gear icon at the top right) > All Settings
- Click on Import via Easy Switch
- Select Gmail
- Click on Connect to Google, a Google OAuth window will open
- Log in with your Gmail account and authorize the access to your mailbox
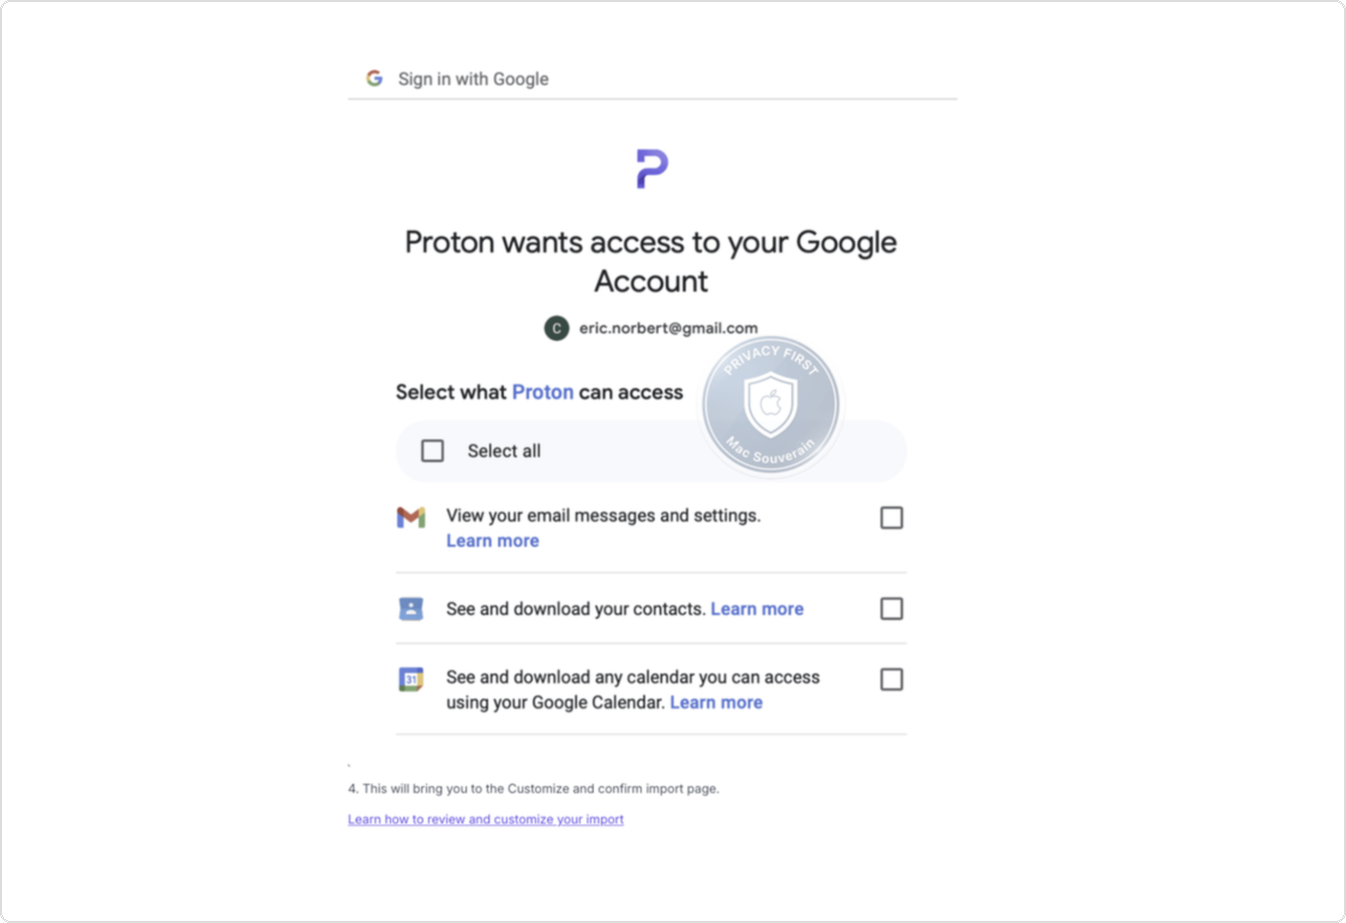
Once connected, Easy Switch will display your Gmail folders (Inbox, Sent, Archives, etc.) and let you choose what you want to import. By default, it selects everything: Starred, All Mail, Important, contacts, and calendars.
Path: Proton Mail web > Settings > All Settings > Import via Easy Switch > Gmail > Connect to Google
What you should see: a list of your Gmail folders with message counts, and an estimate of the import time.
Tip: If you have years of archives, the import can take several hours and will run in the background. You can close the tab and come back later.
Recommendation: import the last 12 months first to start using Proton quickly, then come back for the rest.
Step 3: Import Your Contacts
Emails without contacts are half as useful. Google Contacts exports easily.
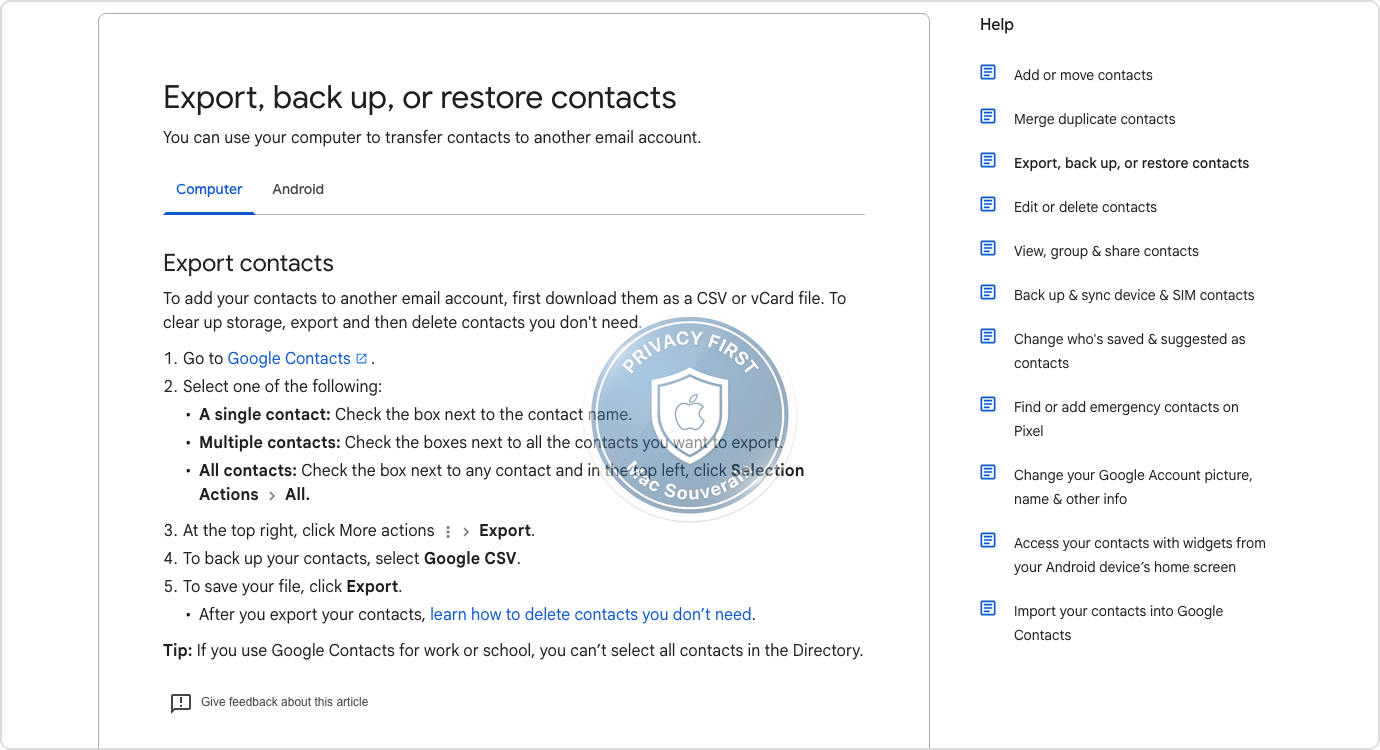
From Google Contacts:
- Go to contacts.google.com
- Click on Export in the left sidebar
- Select All contacts and the format vCard (.vcf)
- Download the
.vcffile to your Mac
Path: contacts.google.com > Export > All contacts > vCard format
In Proton Mail web:
- Go to the Contacts tab (icon at the top left)
- Click on Import
- Select the downloaded
.vcffile - Confirm the import
Path: Proton Mail web > Contacts > Import > select the.vcf file
What you should see: a summary of the imported contacts, with any detected duplicates to merge.
Step 4: Set Up Proton Mail on Mac
Two options depending on your plan.
Option A: Proton Mail desktop app (paid plan, 14-day free trial)
Download the Proton Mail app from proton.me/mail/download.
It’s an Electron app (like VSCode), not a native AppKit app. It’s not as smooth as Apple Mail, but it handles encrypted emails without any additional configuration.
Warning: the desktop app is only for paid plans. Free accounts get a 14-day trial, after which access is limited to the web version on mail.proton.me.
Launch the app, log in with your Proton account, and you’ll access your mailbox directly.
Option B: Apple Mail via Proton Bridge (paid plan)
If you want to continue using Apple Mail with your encrypted Proton emails, you’ll need Proton Bridge, a tool that translates between Apple Mail and Proton servers by decrypting locally on your Mac.
Proton Bridge is only for paid plans.
Read: Proton Bridge + Apple Mail on Mac, the complete guide with all the setup steps.
Step 5: Enable Gmail Forwarding (optional)
This step is optional but highly recommended during the transition period. It ensures you won’t miss any messages while updating your accounts.
In Gmail:
- Open Settings (gear icon at the top right) > See all settings
- Go to the Forwarding and POP/IMAP tab
- Click on Add a forwarding address
- Enter your Proton Mail address
- Gmail will send a verification email to your Proton address, retrieve the confirmation code
- Go back to Gmail, enter the code, and enable forwarding
Path: Gmail > Settings > See all settings > Forwarding and POP/IMAP > Add a forwarding address
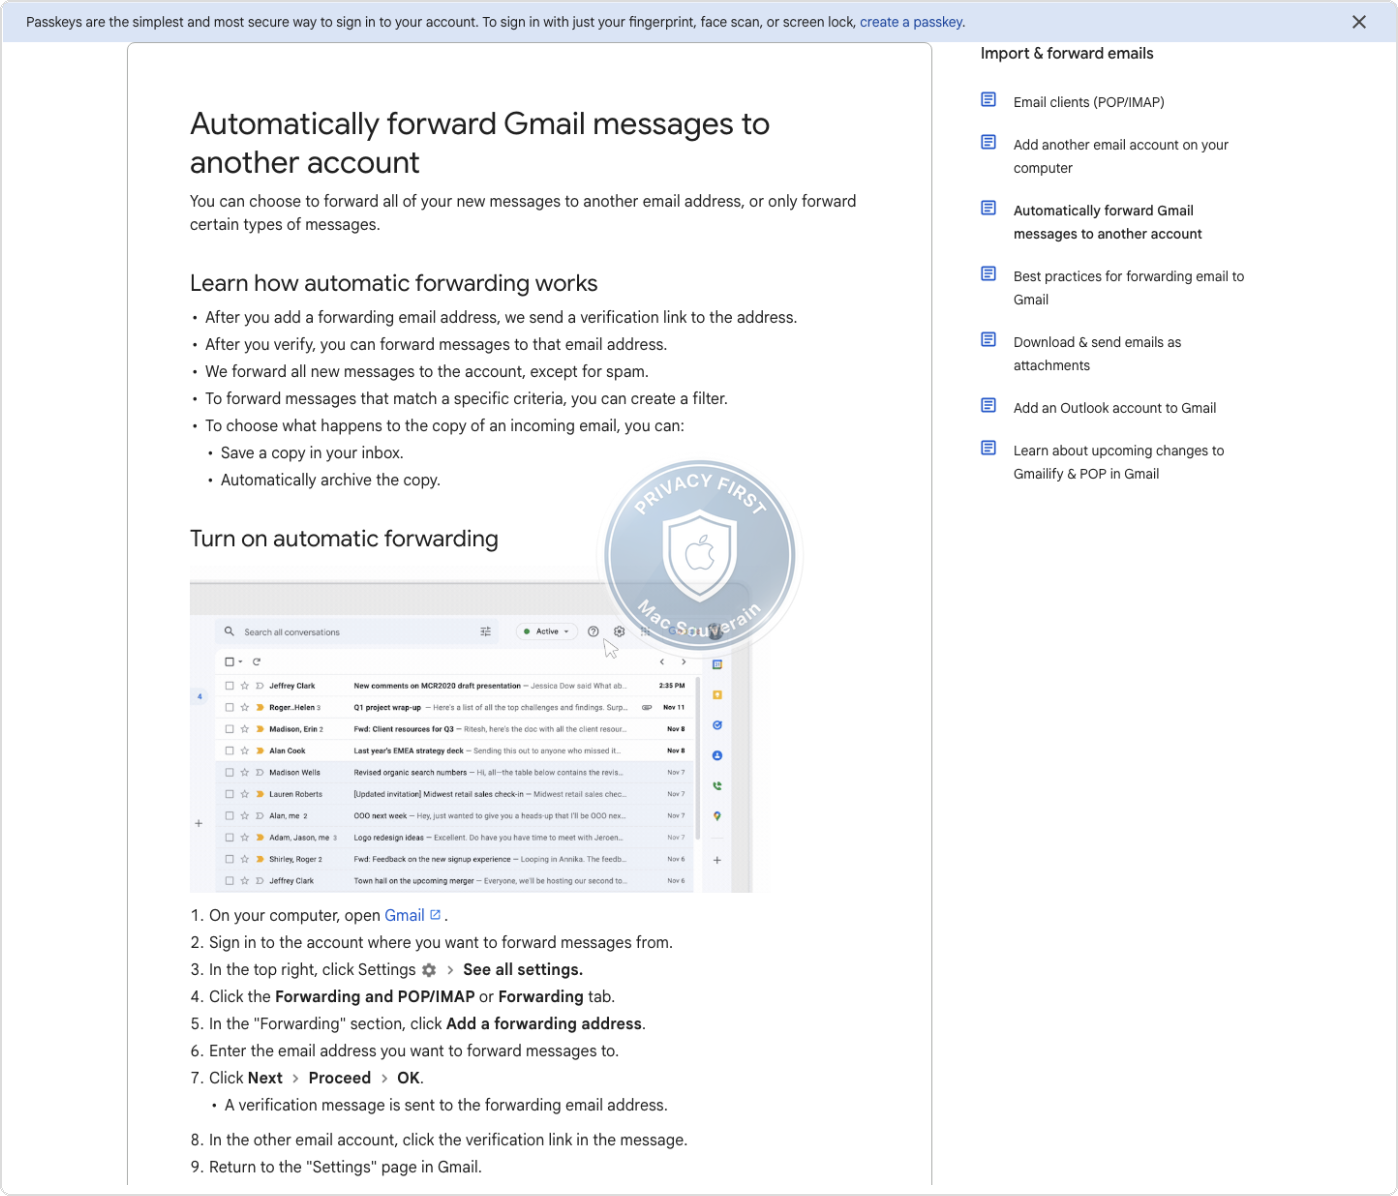
What you should see: your Proton address appears in the forwarding address list with the status “On”.
Tip: Keep this forwarding active for 3 to 6 months. It protects against any forgotten updates while you’re updating your important accounts.
Step 6: Update Your Important Accounts
This is the least automatable part, and frankly the longest. Prioritize in this order:
- Critical accounts first: banks, taxes, insurance, doctor, employer, admin
- Everyday accounts: e-commerce (Amazon, etc.), online services, subscriptions
- Social networks: LinkedIn, Instagram, etc.
- Newsletters: last, or when you unsubscribe
One trick: search your Gmail box for recent emails containing “do not reply”, “no-reply” or “transaction” to spot the services still active.
Better than handing out your real address everywhere: use SimpleLogin. It’s an email alias service bought by Proton and included in every paid plan.
Instead of putting [email protected] on every site, you create a unique alias per service (something like [email protected]). The emails land in your Proton box, but if a service gets breached or sells your address on, you disable the alias and it’s sorted. Zero spam, zero leak of your real address. You manage all of it from app.simplelogin.io or straight from the SimpleLogin browser extension.
For each service, log in, go to the account settings, and update the email address, ideally with a SimpleLogin alias rather than your Proton address directly. Check the confirmation email in your Proton box.
If It Doesn’t Work
Problem: the import stops midway or seems to stall
Probable cause: Gmail imposes a daily bandwidth limit on IMAP exports. If your mailbox is large, Gmail cuts the flow off after a certain volume.
Solution: do nothing. Easy Switch picks up again automatically the next day, when Gmail resets the limit. For very large mailboxes, the import can spread over several days.
Problem: Easy Switch stays stuck or shows an authorization error
Probable cause: IMAP access disabled on the Gmail account, or a Google Workspace account with administrator restrictions.
Solution: in Gmail > Settings > See all settings > Forwarding and POP/IMAP > Enable IMAP. If you’re on a Workspace business account, the Google admin may have disabled third-party IMAP access, get in touch with them.
Problem: the import is very slow or seems frozen
Probable cause: large email volume, Proton servers under load.
Solution: let it run in the background. The import can take several hours for large mailboxes. Proton sends a confirmation email when it’s done.
Problem: the verification email for Gmail forwarding never arrives on Proton
Probable cause: propagation delay, or the email landed in the Proton Spam folder.
Solution: check the Spam folder in Proton. If it’s still missing after 10 minutes, relaunch the verification from the Gmail settings.
Problem: Proton Bridge won’t connect to Apple Mail
Probable cause: the Bridge app-specific password wasn’t copied correctly into Apple Mail.
Solution: in Bridge, regenerate the app password and carry it over into Apple Mail > Accounts > [Proton account] > Password. See the dedicated guide.
For the Impatient
What this article does: migrate a Gmail mailbox to Proton Mail on Mac without losing any emails, while keeping a temporary forwarding active during the transition. The import is done through Proton’s Easy Switch tool (OAuth connection, no Gmail password needed on Proton).
In practice:
- Create an account on proton.me/mail (free to start)
- Proton Mail web > Settings > Import via Easy Switch > Gmail > Connect to Google
- contacts.google.com > Export > All contacts > vCard (.vcf)
- Proton Mail web > Contacts > Import > select the.vcf file
- Proton Mail desktop app on proton.me/mail/download (paid, 14-day free trial available) or web version on mail.proton.me (free) or set up Proton Bridge + Apple Mail (paid plan required)
- Gmail > Settings > Forwarding and POP/IMAP > Add a forwarding address = your Proton address
- Update important accounts in order of priority (banks, admin, services, networks)
Any technical terms? Check the glossary.