Mac and Tailscale, your private WireGuard network in 15 min flat
Build an encrypted private network across all your Macs in 15 minutes, without opening a port or touching your router. Install, MagicDNS, remote file access, reaching your services without exposing them, the real limits.
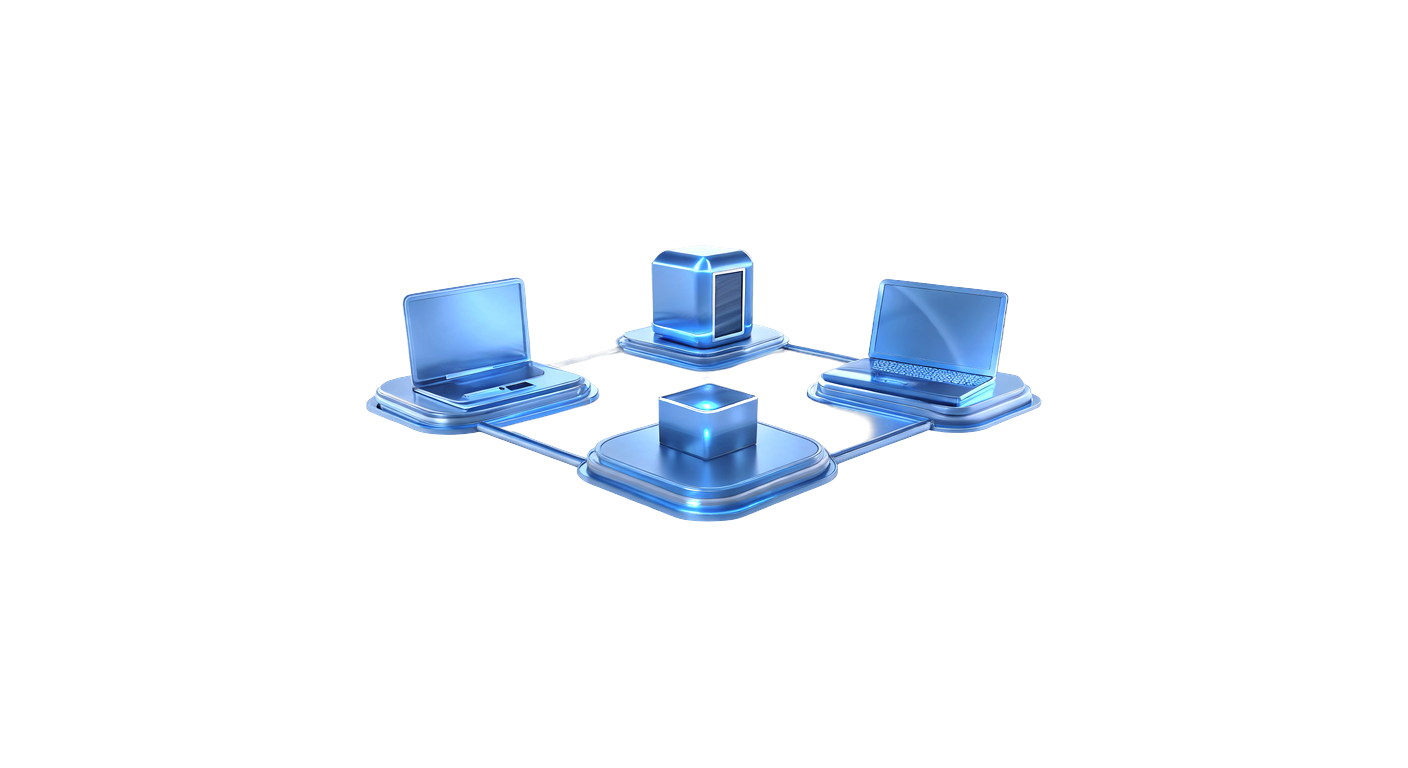
You own more than one Mac. A desktop at home, a laptop that travels, maybe an old Mac recycled into a file server, or even a Mac mini dedicated to a sovereign LLM (read the article).
That LLM, you want to be able to query it wherever you are, and from whichever Mac you happen to be on.
And your files, same thing. Because right now, without iCloud, every time you want to move a folder from one to the other, it’s the same circus: AirDrop playing deaf, a USB stick you can’t find, or a network share that worked last week and not today.
There’s a clean way to settle this once and for all. You put all your machines on a single private network, a mesh, encrypted end to end by a rock-solid protocol, WireGuard, where each Mac can reach the others directly, whether they’re in the same room, on the other side of the country or on another continent.
The whole thing in a quarter of an hour, without opening a single port, without touching your router’s settings and without a terminal. Admit it, you’re impressed, aren’t you?
This tool is called Tailscale, and here’s how you set the network up.
What exactly is a mesh VPN
You already know the word VPN. A classic VPN is a tunnel: your Mac connects to a remote server, and all your traffic goes through that server. Perfect for hiding your browsing or unblocking a catalogue abroad. But it doesn’t link your machines to each other.
Further reading: Why you need a VPN and how to choose one
A mesh VPN is the opposite idea. Instead of routing everything through a central server, each machine talks directly to each other one, in a straight line, inside its own encrypted tunnel. Your five Macs form a web where each one is connected to all the others. That’s where the word mesh comes from.
Concretely, it’s as if your machines were all plugged into the same network switch, in the same room, with invisible, encrypted cables. Except they can be at your place, on the other side of the country and in a closet in the basement (you still need a cable, mind you!), and it works just the same.
Under the hood, Tailscale builds on WireGuard, a modern encrypted tunnel protocol, compact enough to be audited top to bottom and built straight into the Linux kernel. Mullvad, Proton VPN and plenty of others have adopted it, this is no home-made gadget.
You don’t have to configure it, Tailscale handles that. Your job is to click “Connect” on each machine. The dirty network work, punching through routers and firewalls, that’s what it takes on.
One thing to state right away: the Tailscale apps that will run on your machines are open source and audited. The service, however, is steered from a web console run by the company Tailscale, under US jurisdiction. We’ll come back to that at the very end of the article, because it matters for the rest of the series.
What you need
Three things, and you probably already have them.
At least two machines. Two Macs, or a Mac and an iPhone, or ten devices, it doesn’t matter. The principle is the same from two onward.
An account to identify yourself. Signing up to Tailscale goes through an existing identity provider, Apple, Google, GitHub or Microsoft. To stay in the home-grown spirit, you can absolutely pick “Sign in with Apple”. No new password to remember.
A quarter of an hour. Most of it will be spent watching two downloads finish. The rest is clicks.
Worth noting: this guide talks about Macs, but the app also exists on iPhone and iPad. Once the network is up, adding your phone to the same web takes thirty seconds. Handy for the family.
Install Tailscale on your first Mac
Start with the machine you’re sitting in front of.
You have two ways to grab the app. The simplest, the App Store: search for “Tailscale”, install, like any other app. The second, the official site, which gives you a slightly more complete version on the advanced-features side. For a first network between your Macs, the App Store version is plenty. We’ll note the difference further down, when it matters.
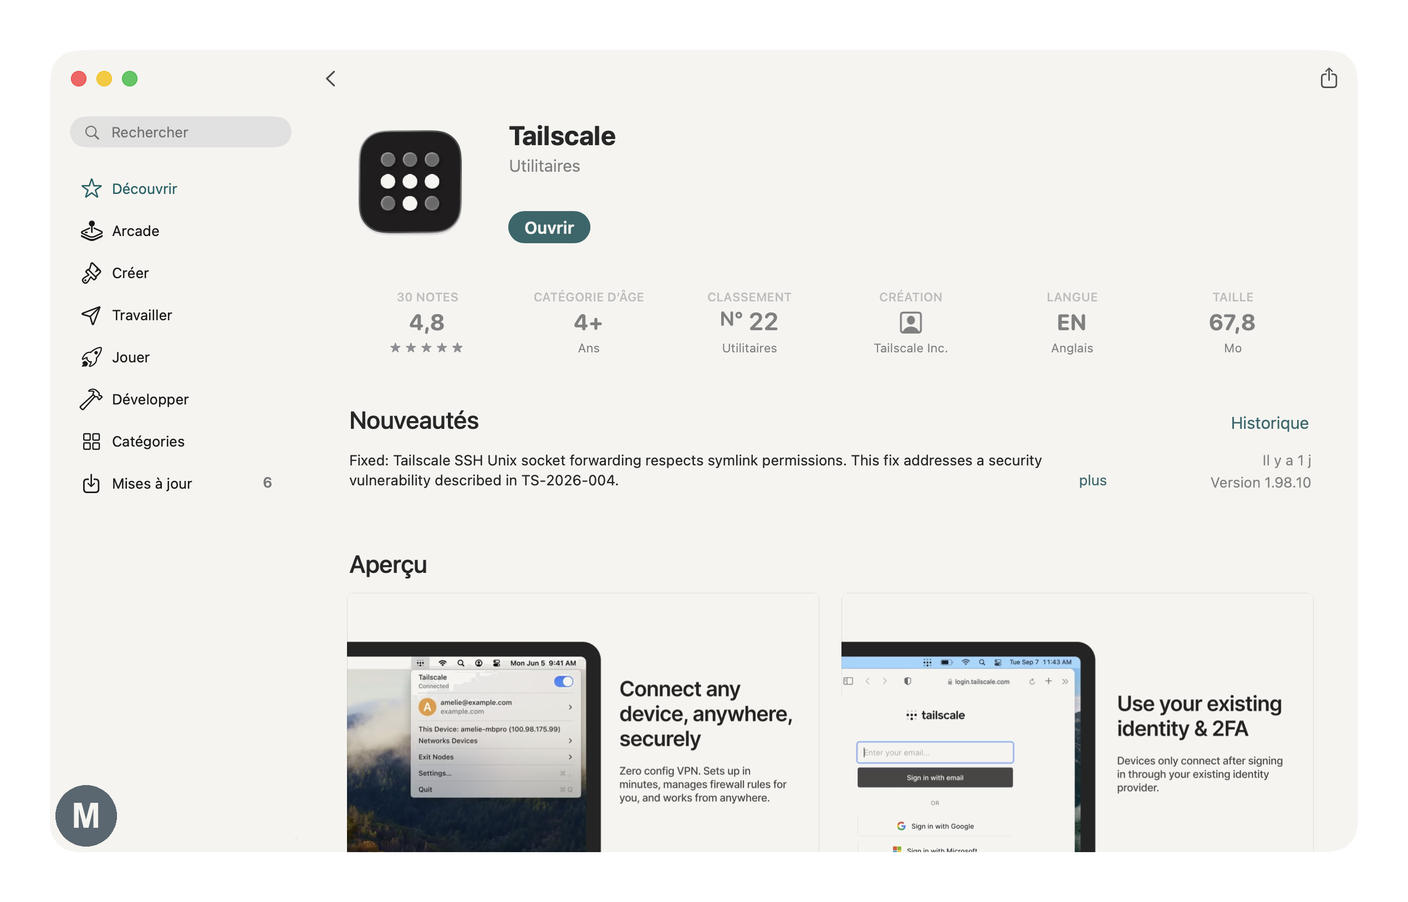
Once the app is installed, launch it. It tucks itself into the menu bar, top right of your screen, next to the clock. Click its icon, then “Log in”. Your browser opens on the Tailscale sign-in page. You pick your identity provider, confirm, and it’s done.
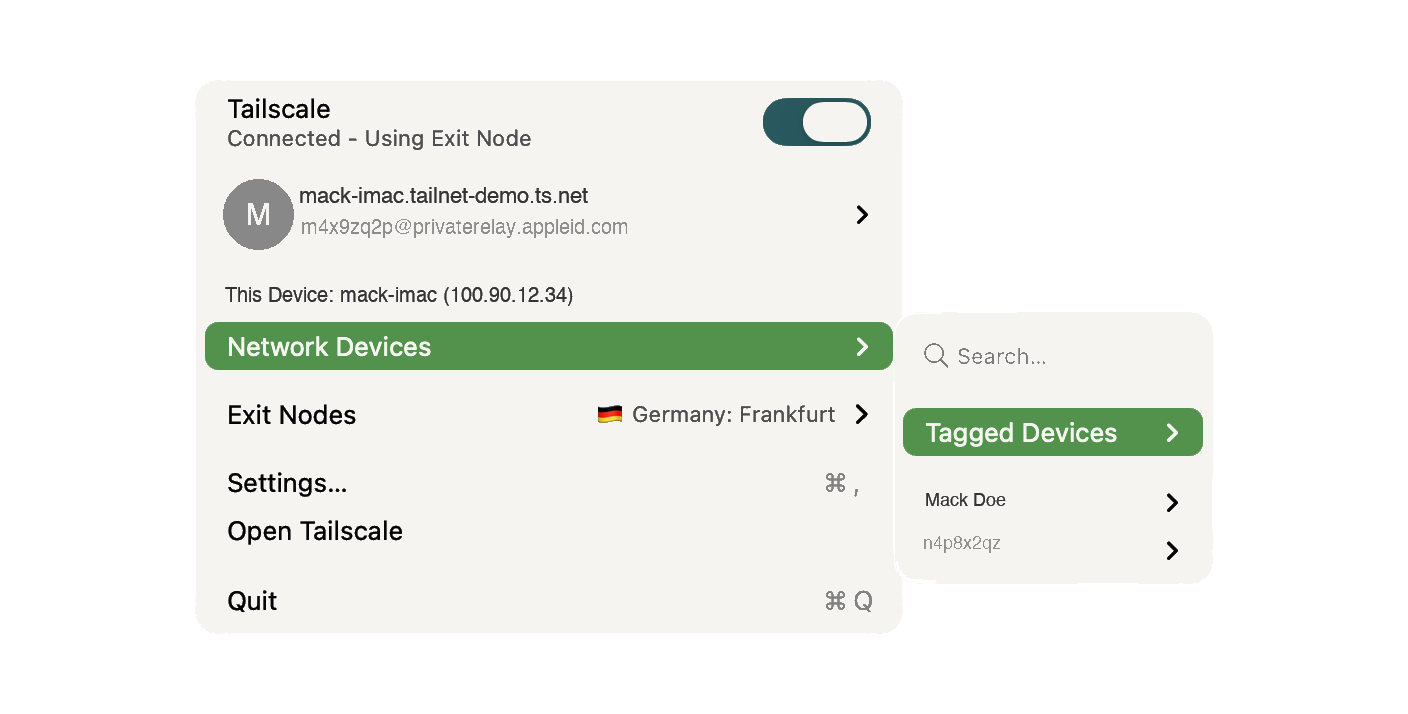
Back in the menu bar, the Tailscale icon animates then settles. Your first machine has just joined its private network, which Tailscale calls a tailnet. For now, it’s alone on it. Let’s find it some company.
If you’d rather drive everything from the keyboard, the app also exists via Homebrew with brew install tailscale. But for a first setup, the graphical app is clearer. Stick with it.
Add the other Macs to the tailnet
Repeat the operation on your second machine.
Install the app, launch it, log in. Crucial point: log in with the same account as on the first Mac. It’s that account that defines your tailnet. Two machines logged in with the same identifier land automatically on the same network, and see each other. Nothing else to configure.
Do it again for each Mac you want to add. The living-room Mac, the laptop, the old server in the closet. Each one joins the web as soon as it logs in with your account.
To check that this little crowd has properly gathered, open the admin console on Tailscale. There you’ll find the list of all your machines, with their name, their address on the tailnet, and a green dot when they’re online. It’s your dashboard. It’s also where you’d boot a device you don’t recognise, in one click.
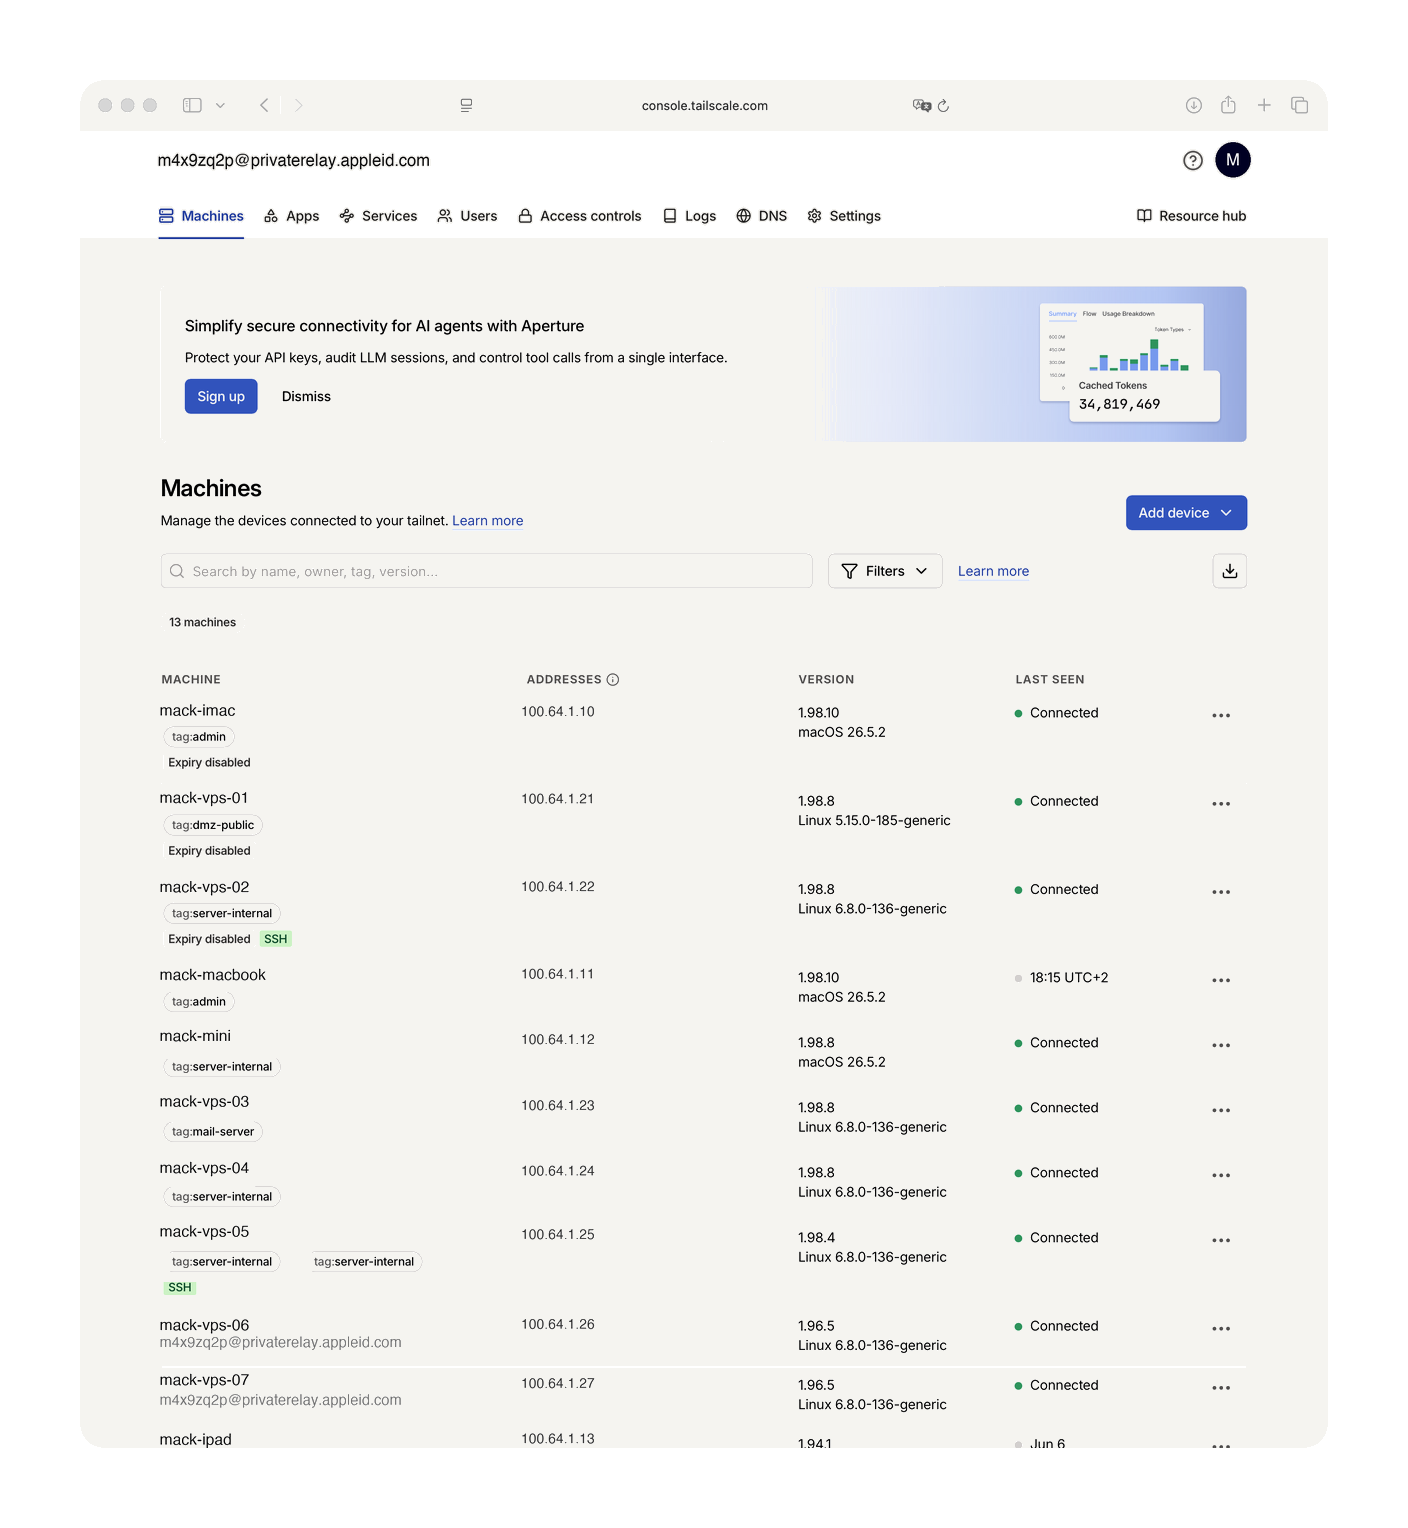
At this stage, your Macs are on the same encrypted private network. Technically, you could already reach them by their address. Except nobody wants to memorise network addresses by heart. Let’s fix that.
MagicDNS, calling your Macs by their name
Here’s the setting that transforms everyday comfort.
By default, each machine on the tailnet has a numeric address. Functional, but unreadable. MagicDNS replaces those numbers with the names of your machines. Your MacBook is called mack-macbook? You reach it by typing mack-macbook, plain and simple. Your closet server is called mack-mini? Same.
Good news, on a tailnet set up today, MagicDNS is already enabled by default. You have nothing to do, other than glance at the admin console, DNS tab, to confirm it’s showing green. Each machine on the tailnet is reachable by its name, from any other, wherever it is.
Each machine’s name is taken from its system name, which sometimes gives you long-winded things like mack-macbook-de-prenom. You can shorten it. In the console, click a machine, then its name. Turn off the Auto-generate from OS hostname switch, type the short name you want, and confirm. That’s the name you’ll use to reach it everywhere.
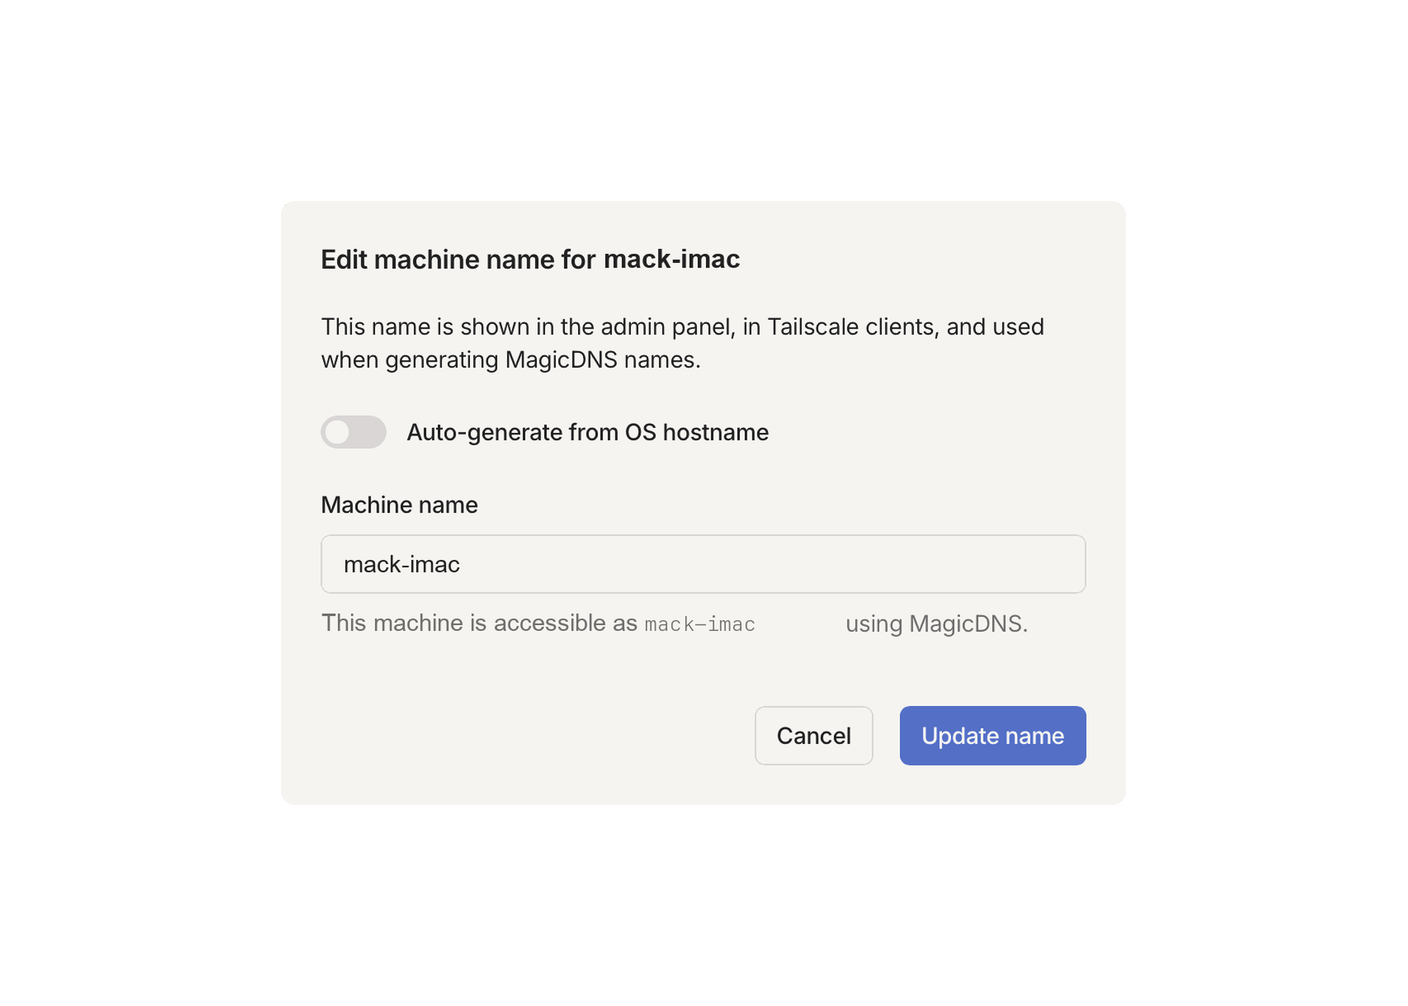
This name resolution stays strictly internal to your tailnet. Nobody but you can guess or reach mack-mini. It’s a private directory that exists only for your machines.
The concrete case, reaching the files on the Mac left at home
Enough theory. Here’s the use that justifies the fifteen minutes all by itself.
You’re on the road with your laptop. The file you need stayed on the Mac at home. You’ll tell me iCloud already does this. Except iCloud means copying your files onto Apple’s servers, and only getting back what you pushed there. With Tailscale, you open the remote Mac’s whole disk, as is, as if it were plugged in over USB. Nothing goes up to a cloud, nothing leaves your machines, and you grab the file from your hotel couch.
First, on the Mac at home, turn on file sharing. System Settings, General, Sharing, then enable File Sharing. You touch nothing else. Definitely not the router, definitely not port forwarding. The share listens, Tailscale handles the path.
Then, from your laptop, open the Finder. Go menu, Connect to Server, or the Cmd+K shortcut. You type smb:// followed by the machine’s MagicDNS name, for example smb://mac-home. You confirm, you enter your login for the remote Mac, and its disk opens in a Finder window. You drag your file across, exactly as if it were local.
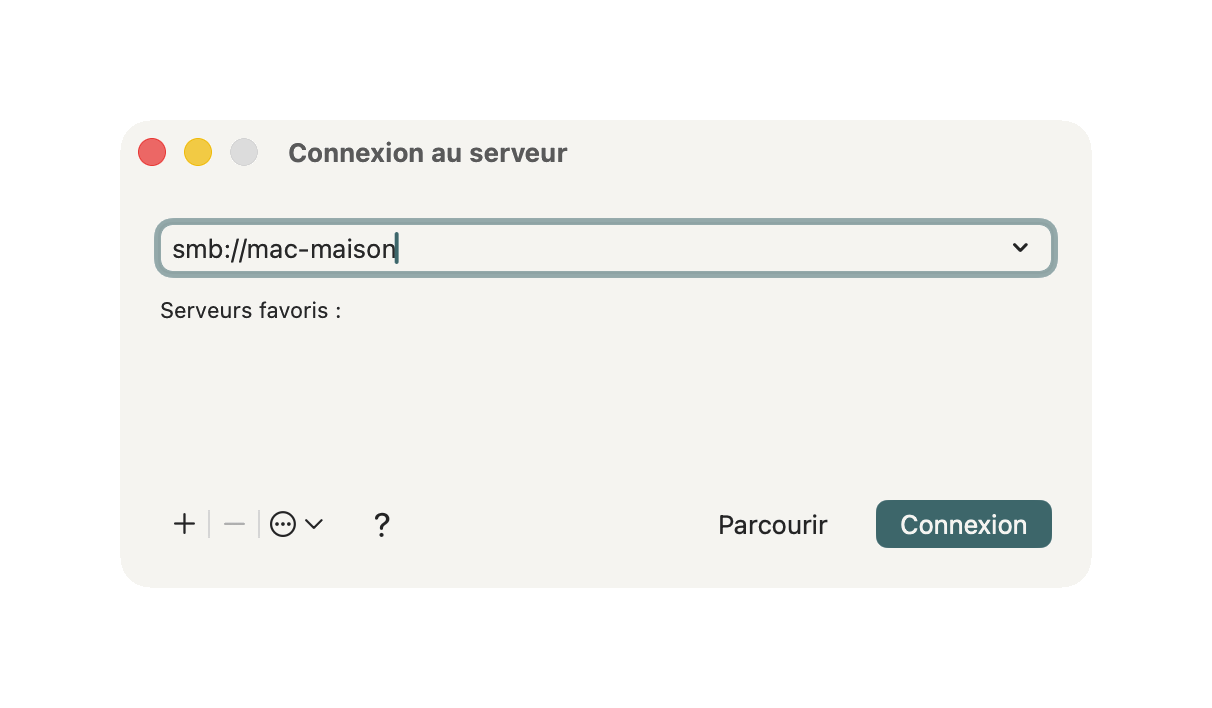
Same logic to take control of another Mac’s screen. On the remote Mac, first enable Screen Sharing: System Settings, General, Sharing, Screen Sharing. Then, in the same “Connect to Server” window, type vnc:// followed by the machine’s name, and you control its desktop remotely. Your parents’ Mac crawling along? You fix it from home, without TeamViewer and without a third party watching the session go by.
All this traffic runs inside the encrypted tunnel. Nothing passes through some server sitting around somewhere. It’s your Mac, your laptop, and one encrypted straight line between the two.
The real win, exposing nothing anymore
Moving files is the example that clicks right away. But the best part of the mesh is what you stop doing: opening doors onto the Internet.
Before, to reach your NAS or your Mac from outside, you had to rig up a port forward on your router. In other words, plant a door on the public Internet, with your address written on it. And that door gets scanned around the clock by robots trying passwords one after another.
With Tailscale, there’s no door at all anymore. Your services listen only on the tailnet, invisible to the rest of the world. Someone scanning your public address sees nothing, because there’s nothing to see.
That changes what you can afford to host at home. A Synology NAS, a Home Assistant, the admin panel of a small server, a site you tinker with on weekends: you reach them by their name from anywhere, and they stay unreachable for everyone else.
You enjoy your machines remotely without ever putting them in the shop window.
Even lousy networks become harmless. The WiFi of a café, an airport, a hotel, those places where anyone can sniff what goes by. Your link to your machines stays inside the encrypted tunnel, on a hostile network as anywhere else.
What you exchange with your tailnet doesn’t leak. And the day a device gets lost or stolen, you open the console, one click, you revoke it. It loses network access on the spot, before you’ve even finished panicking.
Going out differently, exit node and no-log DNS
Two settings are worth a look if sovereignty tickles you.
The first, the exit node: by enabling it on a machine, you push all of another device’s Internet traffic through it. Routing your travelling laptop through your Mac back home, for instance, to browse as if you were there.
The second, in the console’s DNS tab: you force your whole tailnet onto a resolver that logs nothing, like Quad9, and you cut your ISP’s resolvers in one move. Your machines ask who’s who to a no-log service, no longer to your operator.
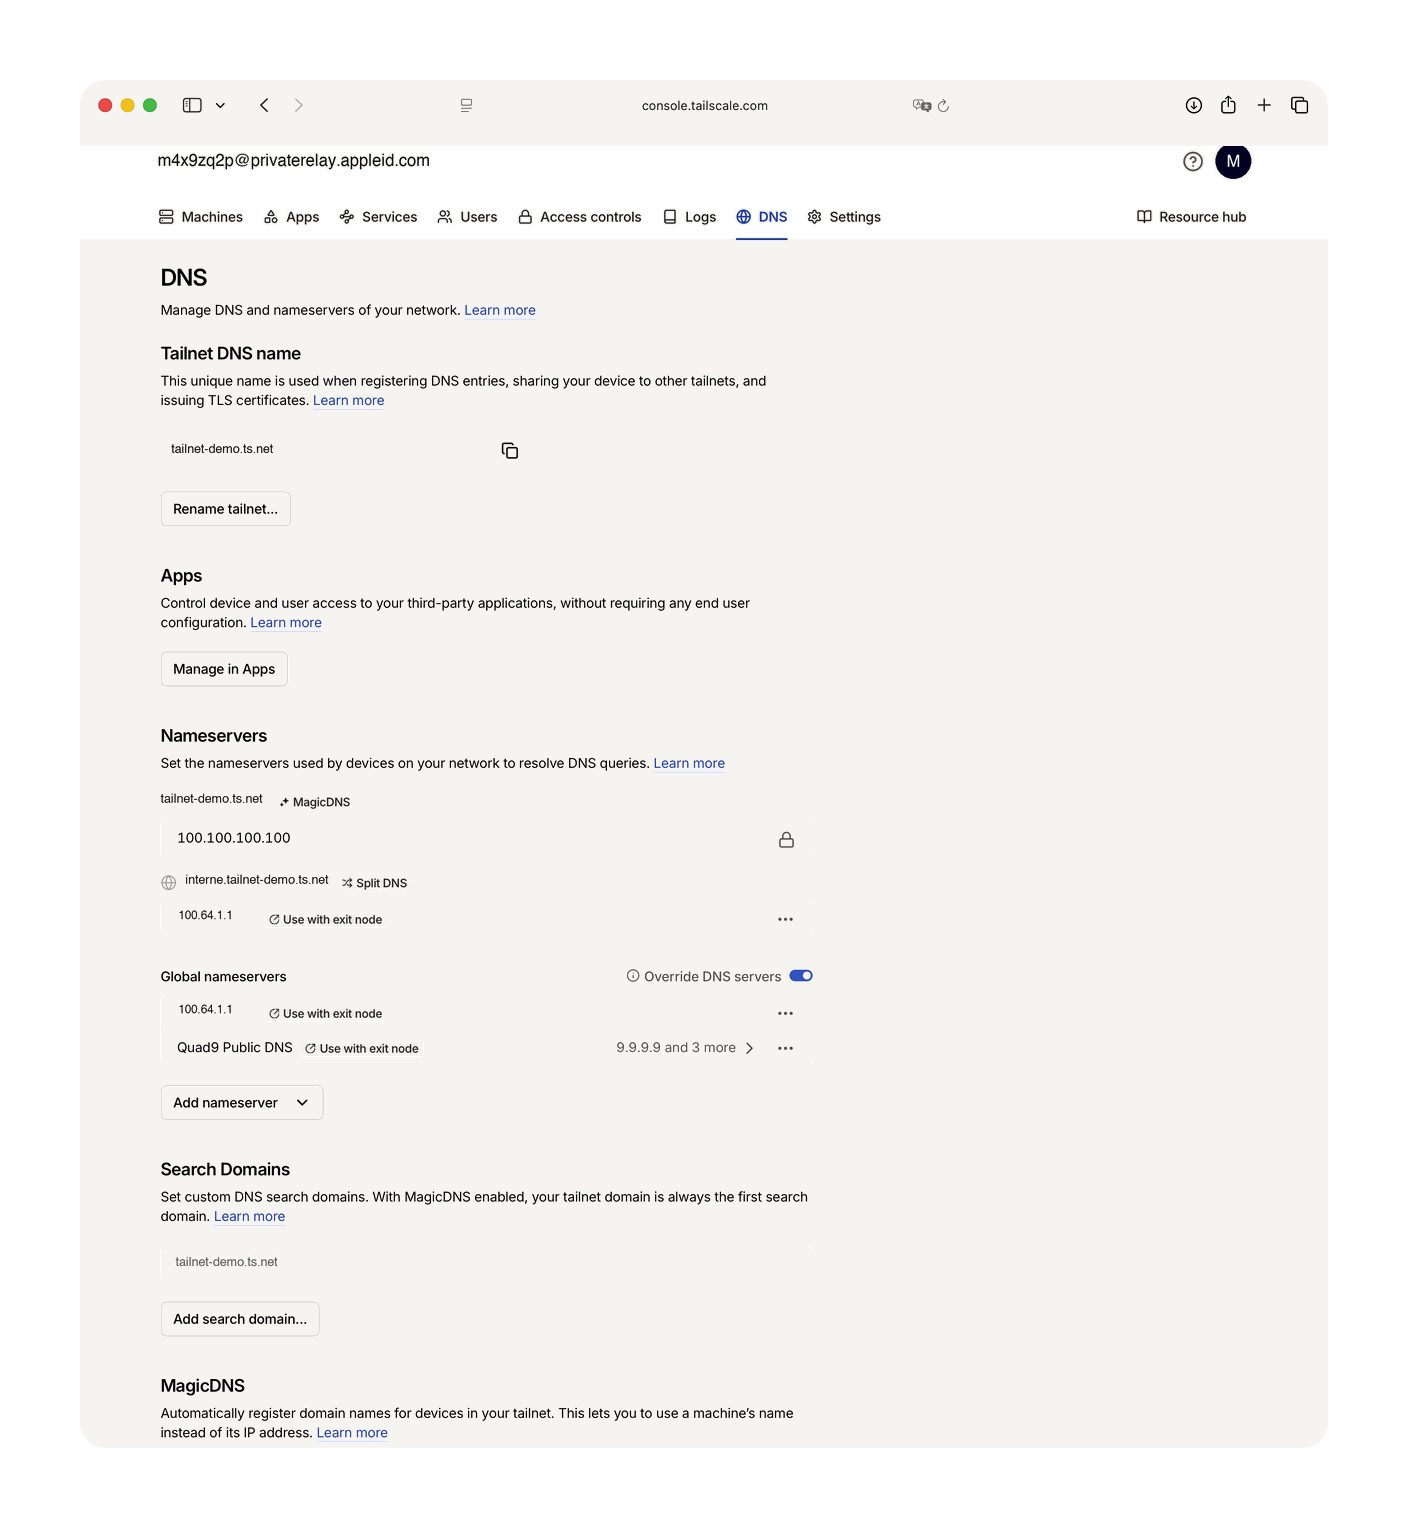
A trap worth knowing, because we fell into it: this setting can be quietly bypassed. If your router hands out its own resolver over IPv6, macOS tends to prefer it, and your requests go back to your ISP without telling you.
The reflex, once your no-log DNS is set: head to ipleak.net and check that none of your operator’s resolvers show up. If one does, turn off IPv6 on your router, or declare your resolver in v6 too. Otherwise, you think you’re on Quad9 while you’re still on your ISP.
The limits, worth knowing before you dive in
Tailscale does the job remarkably well, but there are real boundaries. Might as well know them.
The free plan is generous, not unlimited. The Personal plan comfortably covers an individual or a family: up to 6 users, with an unlimited number of personal devices. As long as you’re building your own network for your own machines, you’ll never hit the wall.
It’s only if you want to share your tailnet with a whole tribe, beyond six people, that you tip over into a paid plan. Another boundary of the free tier: it’s reserved for personal use. To run a business on it, that’s a paid plan.
It’s not an anonymity VPN, at least not by default. Tailscale encrypts the traffic between your machines, but it doesn’t mask your browsing toward the rest of the web.
The exit node sends your traffic out through another machine. The catch: if that machine, your Mac at home for instance, has no VPN itself, your traffic comes out in the open from its address. You go out “from home”, not anonymously.
The real answer is the Mullvad option built into Tailscale: 5 dollars a month for five devices, and you use Mullvad’s servers as exit nodes, no-log, in some fifty countries, without leaving the app or creating a separate account.
Why the add-on rather than running the Mullvad or Proton VPN app on the side? Because a classic VPN that grabs all your traffic conflicts with Tailscale and can flat-out cut your tailnet. The add-on, on the other hand, coexists cleanly. That’s why I run with it on my network.
The App Store version is slightly clipped. To stay in Apple’s sandbox, the App Store version sets aside a few side features: it can’t run the tailscale ssh command (you go through the classic ssh instead), and loses Screen Time compatibility as well as the full configuration reports. The exit node, though, works identically in both versions. If one day you want those features, uninstall and pick up the version from the official site. For the file network described here, no difference.
Identity goes through a third party. No home-grown email-plus-password account: you identify yourself via Apple, Google, GitHub or Microsoft. It’s safer technically, but it means an external provider sits in the sign-in loop. Choosing Apple limits the damage if that point nags at you. One nuance, though, Tailscale also offers the OIDC option, plugging in your own identity provider. That’s the thread we pull in the next article.
And afterwards, cutting the coordinator’s cord
Your network is running. In fifteen minutes, you’ve done what would have taken an evening of network config five years ago.
There’s one detail left that will nag at the most sovereignty-minded among you. The little server that orchestrates all this, the one that introduces your machines to each other, is run by an American company, therefore subject to US law, CLOUD Act included. Washington can thus demand what it holds about you, even stored outside the United States.
The good news, your files don’t leak through it, the content travels encrypted, straight from one machine to another, the coordinator doesn’t have the keys. The less good, it sees everything else: the list of your devices, their names, who connects to whom and when. The map of your network, in short. A link you don’t control.
In the next article in the series, we replace that link with your own. We stand up your own control server with Headscale, the open source re-implementation of the coordinator, and there, the whole network belongs to you end to end. One more step toward the sovereign home.
Coming soon: Sovereign Tailscale, running your own coordinator with Headscale
Further reading: What digital sovereignty looks like in practice
Technical terms in this article? Check the glossary.