Install your first AI model locally on Mac
An AI model that runs 100% offline on your Mac Apple Silicon, in 20 minutes, without typing a single command. Install LM Studio, pick a model in MLX, enter your first prompt, then the ultimate test: cut the Wi-Fi.

Series · episode 2 of 3Your AI, at Home Contents
- 1 Your AI can be turned off by the US, build your own
- 2 Install your first AI model locally on Macyou are here
- 3 Put your local AI to work, no cloud
Previous Article: We set the stage. Your access to a distant AI model can be cut off overnight by an arbitrary decision, and the only thing still running the next morning… is nothing.
We also mapped out what a Mac Apple Silicon runs locally, from the small model that sorts your notes to the large model that writes.
That was the why. Here’s the how.
Good news up front: you need no technical skill, no command line, and no additional hardware. If you’re reading this on a recent Mac, you already have everything. Count twenty minutes, most of it watching a progress bar.
At the end, you have a capable model that responds entirely on your machine. And to prove it, at the very end, we’ll cut the Wi-Fi.
What you need
Three things, and you probably already have them.
A Mac Apple Silicon, that is, an M1 to M5 chip. Most Macs sold since late 2020 have one. If you have an Intel Mac, this method doesn’t apply, efficient local inference relies on Apple Silicon’s unified memory.
A reasonably recent version of macOS, Sonoma (14) or later for the tool we’ll use. If you haven’t updated in a while, now’s the time.
RAM, and that’s where the model choice comes in. Quick refresher from the previous article: on a 16GB Mac, once the system is served, you have 8 to 10GB left for AI, enough to run a 7 to 8 billion parameter model.
On a 32GB, you step up a class, up to a 24 billion parameter model. The golden rule, never choose a model that fills the entire budget, or your machine will struggle or crash.
If you want the RAM budget details and the full model map, it’s all in the previous article. Here, we install.
The tool: LM Studio, zero terminal
There are several ways to run a model locally. For a first step, one deserves to be singled out: LM Studio.
It’s a classic desktop app, with windows, buttons, and a search field. You download your models from an integrated library, click, chat. No command line, no config files to edit, no esoteric maneuvers. It’s local AI presented as a normal app, and for getting started, that’s exactly what you want.
LM Studio is free, for personal and professional use. And on Mac Apple Silicon, it comes with the best engine possible, we’ll get back to that in two minutes.
The curious and the hungry have other options, Ollama on the command line, MLX for going metal. We’ll mention them at the end, once you already have a running model. One thing at a time.
Install LM Studio
Nothing more than an ordinary Mac app.
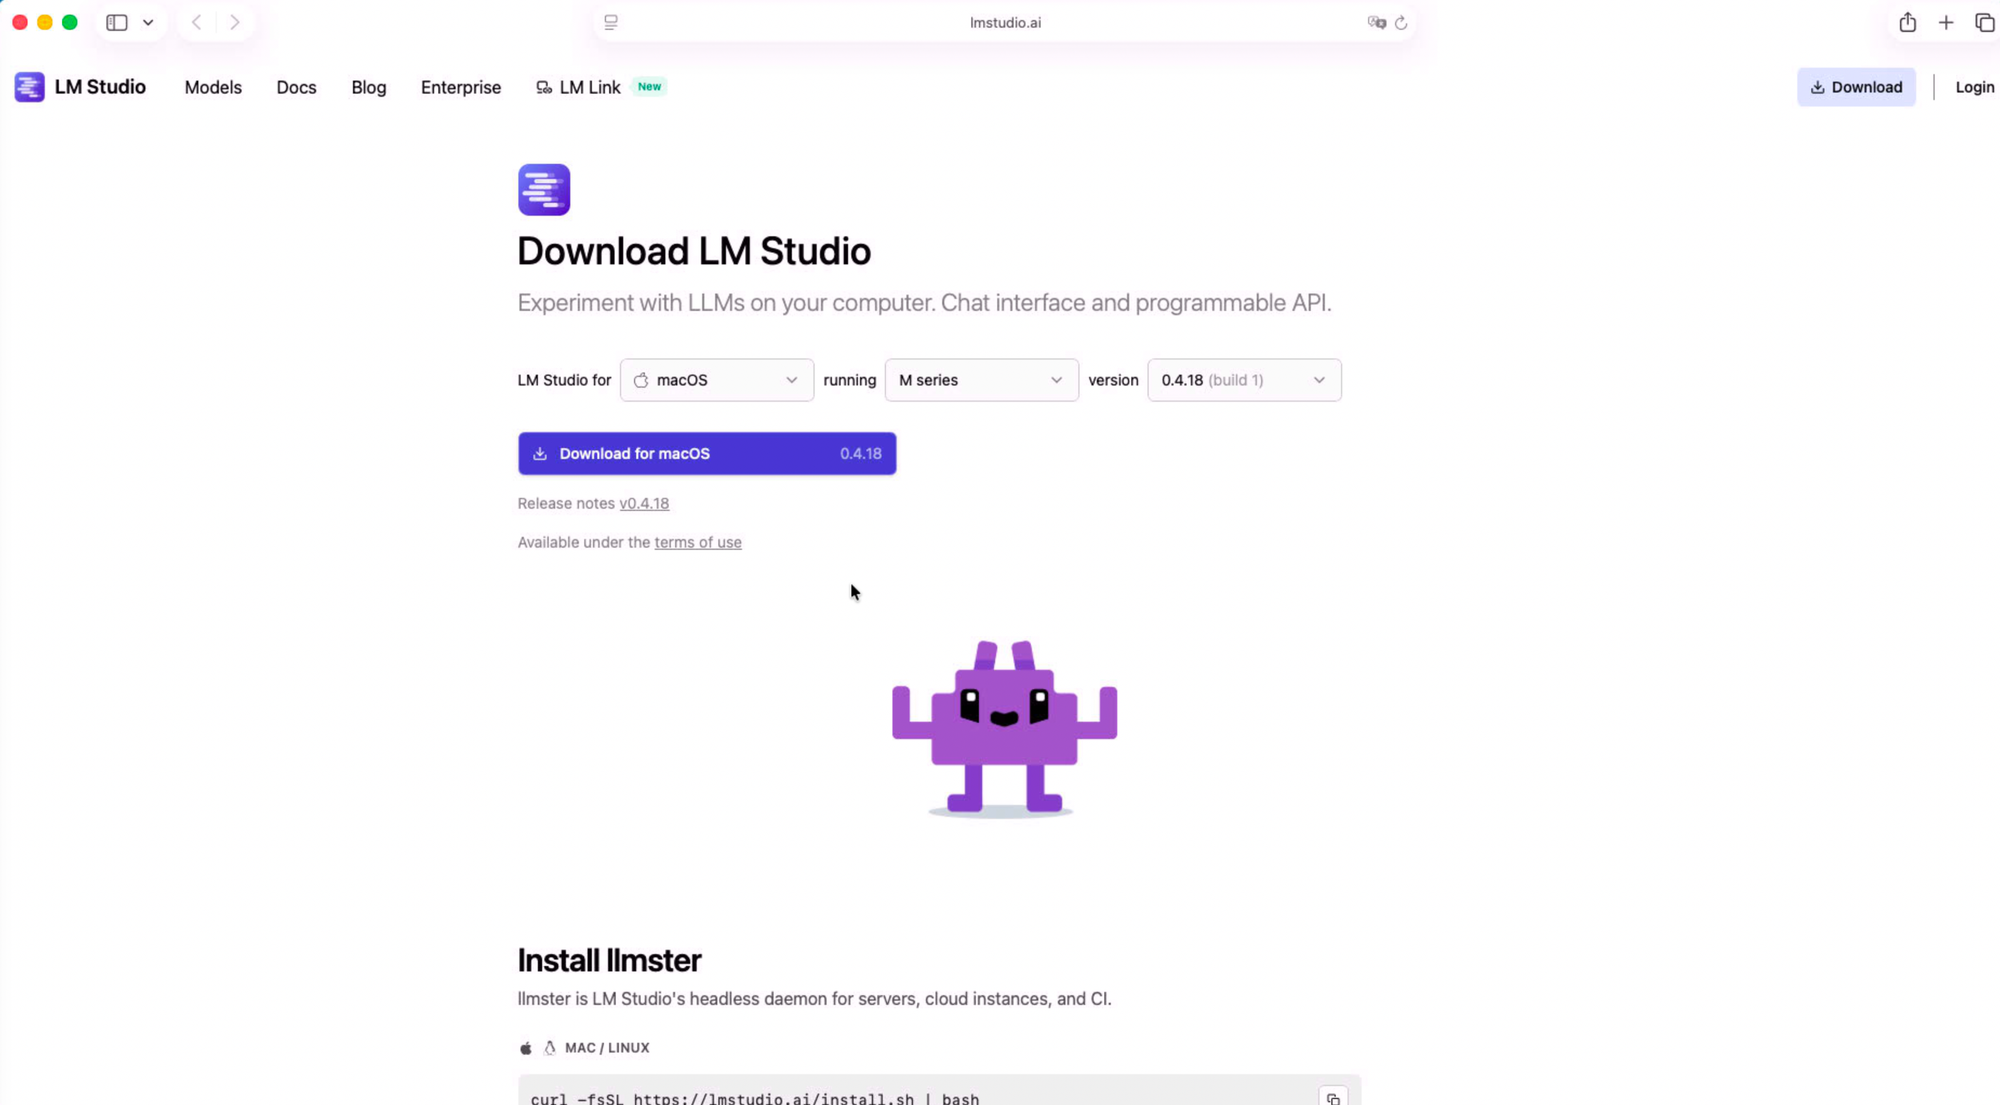
Go to lmstudio.ai and download the Mac version. The site detects your machine and offers the right build, the one for Apple Silicon. You get a .dmg file, the usual Mac installation format.
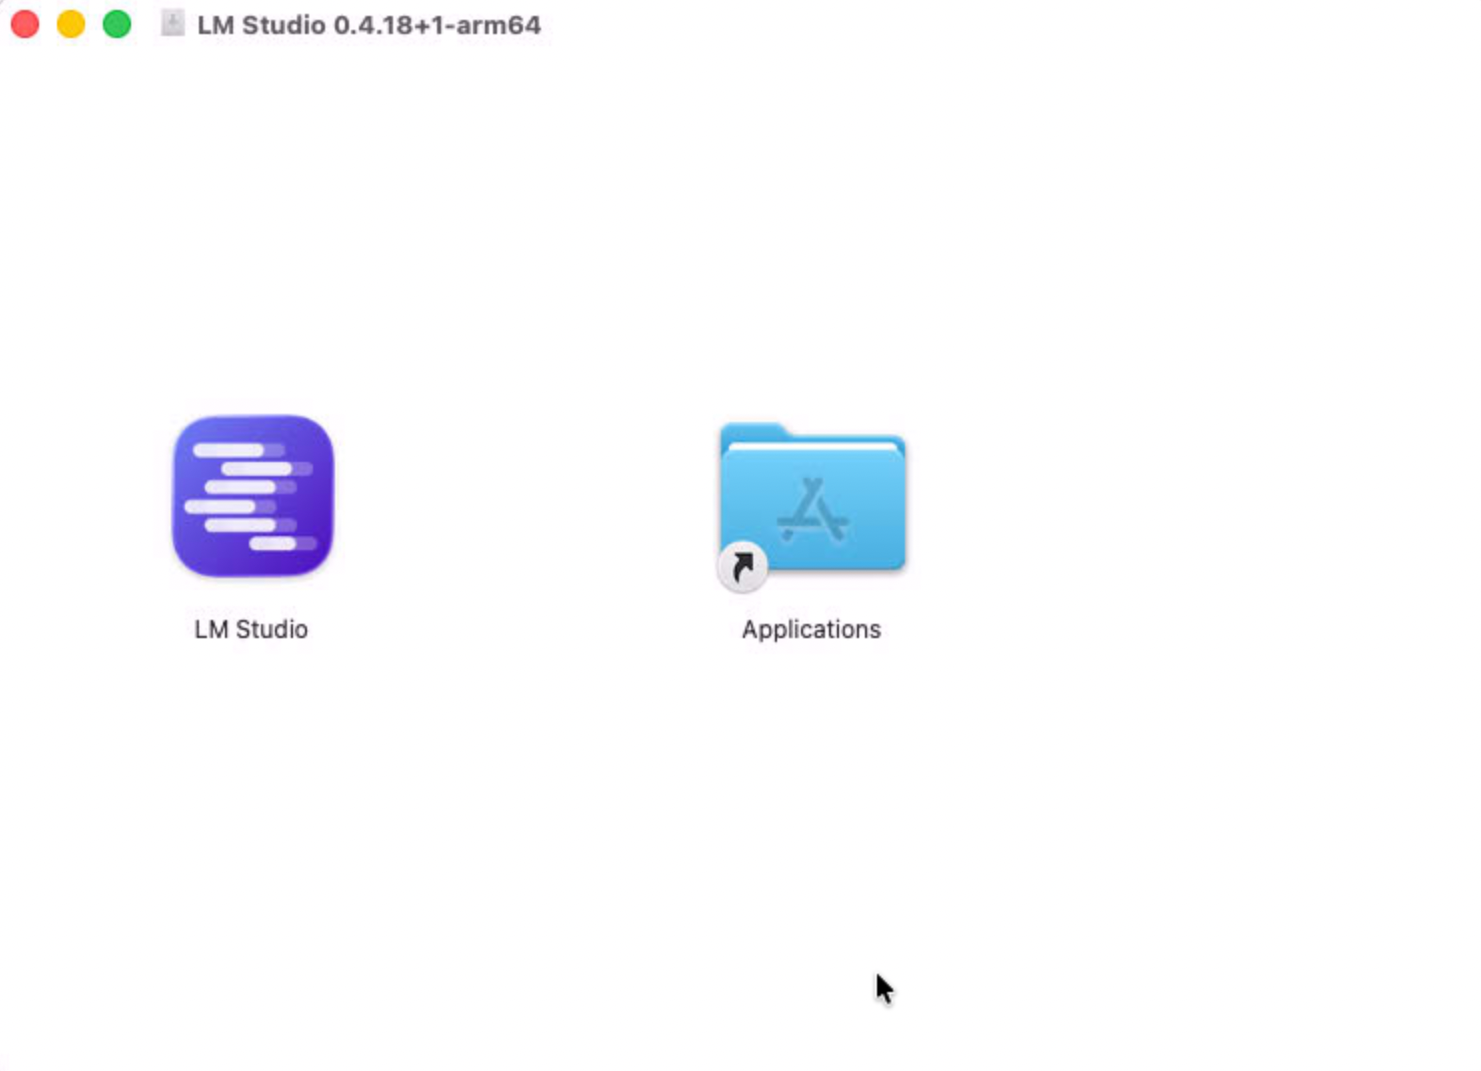
Open the downloaded .dmg. A window appears with the LM Studio icon and a shortcut to your Applications folder. Drag the icon to the Applications folder, just like any other app. That’s it, nothing to check, nothing to configure.
Launch LM Studio from Launchpad or your Applications folder. On the first launch, macOS might ask you to confirm opening an app downloaded from the internet, confirm. The app opens on a welcome screen that offers to choose a first model. Let’s go.
Choose and download your first model
This is the crucial step, and the one where we’ll be precise, because not all models are equal and the right choice depends on your RAM.
Stick to the sovereign pick from the previous article. On a 16GB Mac, aim for Qwen2.5 7B, a model under Apache 2.0 license, truly free, that runs the essentials of daily life. On a 32GB Mac, aim for Mistral Small, a 24 billion parameter model, European and also under Apache 2.0, tailored for sustained writing and long document analysis.
In LM Studio, open the search tab, the magnifying glass icon in the sidebar, and type the model name. The library is connected to Hugging Face, the big model hub, so you’ll see several variants of the same model. That’s normal, and that’s where you need to know how to read.
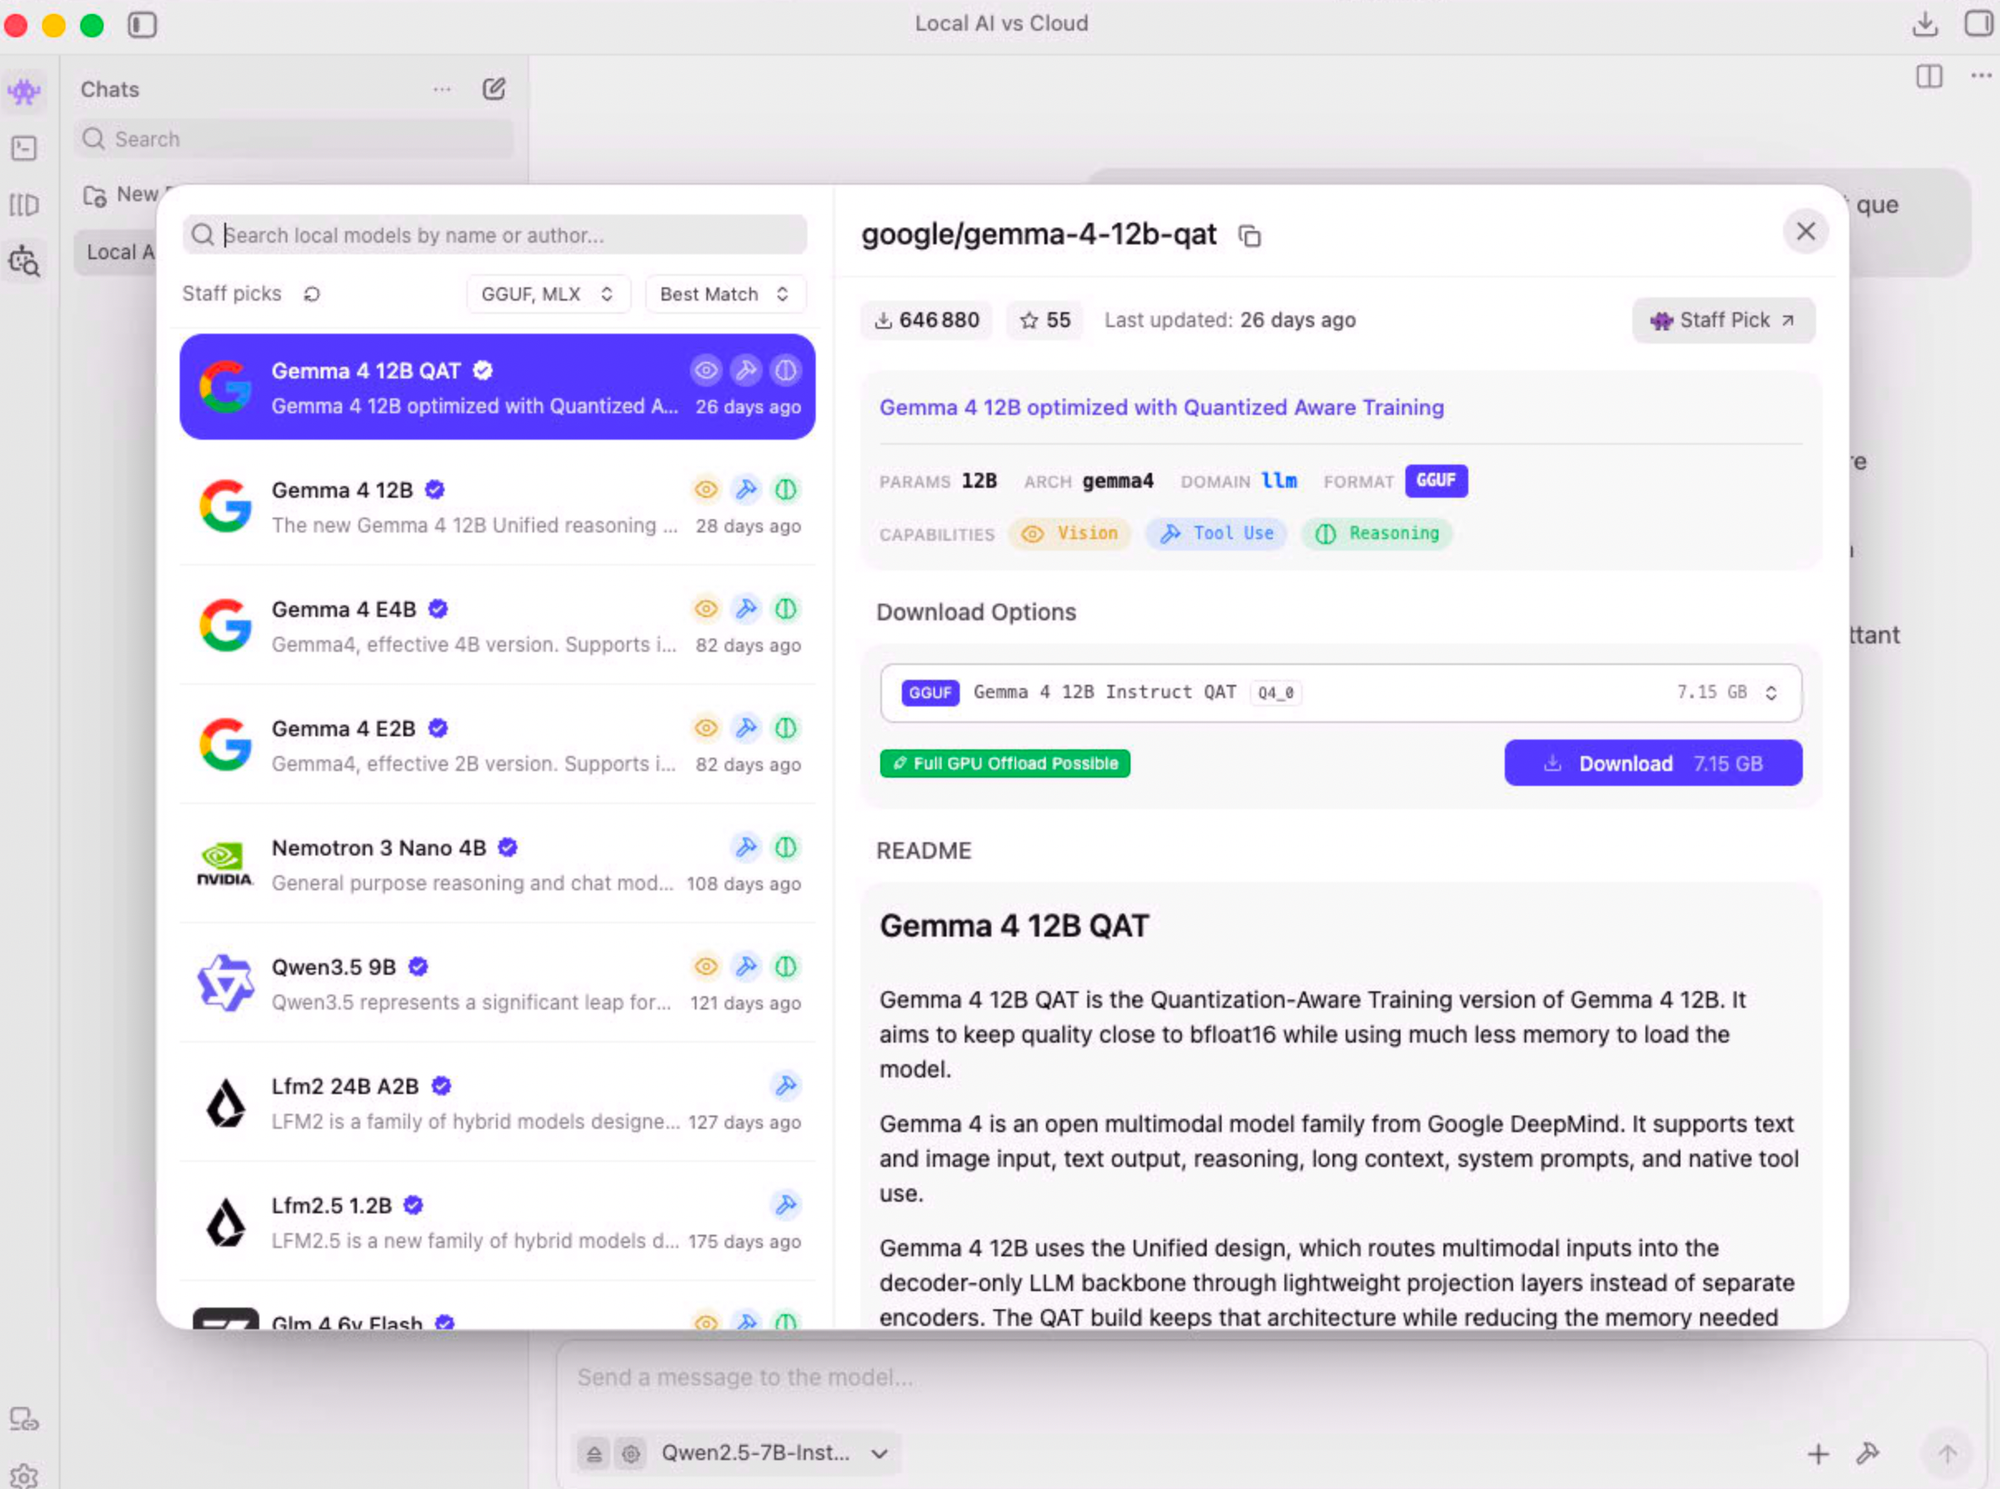
Two things to decode on each variant.
The format. You’ll encounter two words, MLX and GGUF. Just remember this: MLX, the calculation framework made by Apple, is the engine optimized for Apple Silicon’s unified memory. On your Mac, an MLX version runs notably faster than the same one in GGUF, quality equal.
LM Studio comes with this MLX engine, might as well use it. Choose the MLX version of the model whenever it’s available. If a model only exists in GGUF, that’s fine, it still works, just a bit slower.
Quantization. You’ll see labels like 4bit, Q4, Q4_K_M, Q8. That’s the model’s compression level. A raw model weighs a fortune in memory, quantization reduces the precision of its weights to make it fit in your RAM, at the cost of a barely noticeable quality loss.
Q4, or 4bit, is the sweet spot for starting, it divides the model’s weight by about four without you noticing much of a difference. Q8 is more faithful but twice as heavy, keep it for later if you have the RAM.
In practical terms, what you’re downloading:
- On 16GB, Qwen2.5 7B in MLX 4bit weighs around 4.3GB. It’s well within your RAM.
- On 32GB, Mistral Small 24B in MLX 4bit weighs around 13 to 14GB. It’s within your margin without killing your machine.
Choose the right variant, MLX and 4bit, and click download. A progress bar appears, you can follow the download in the downloads tab. Time for a coffee break, the file is several gigabytes.
A word on version numbers. Models evolve, Mistral Small is already at a revision more recent than the one named in the previous article. Don’t sweat the exact number, just pick the latest Mistral Small 24B offered in MLX in LM Studio, that’s the one you want.
Your first prompt, then cut the Wi-Fi
The model is downloaded. Time for the moment of truth.
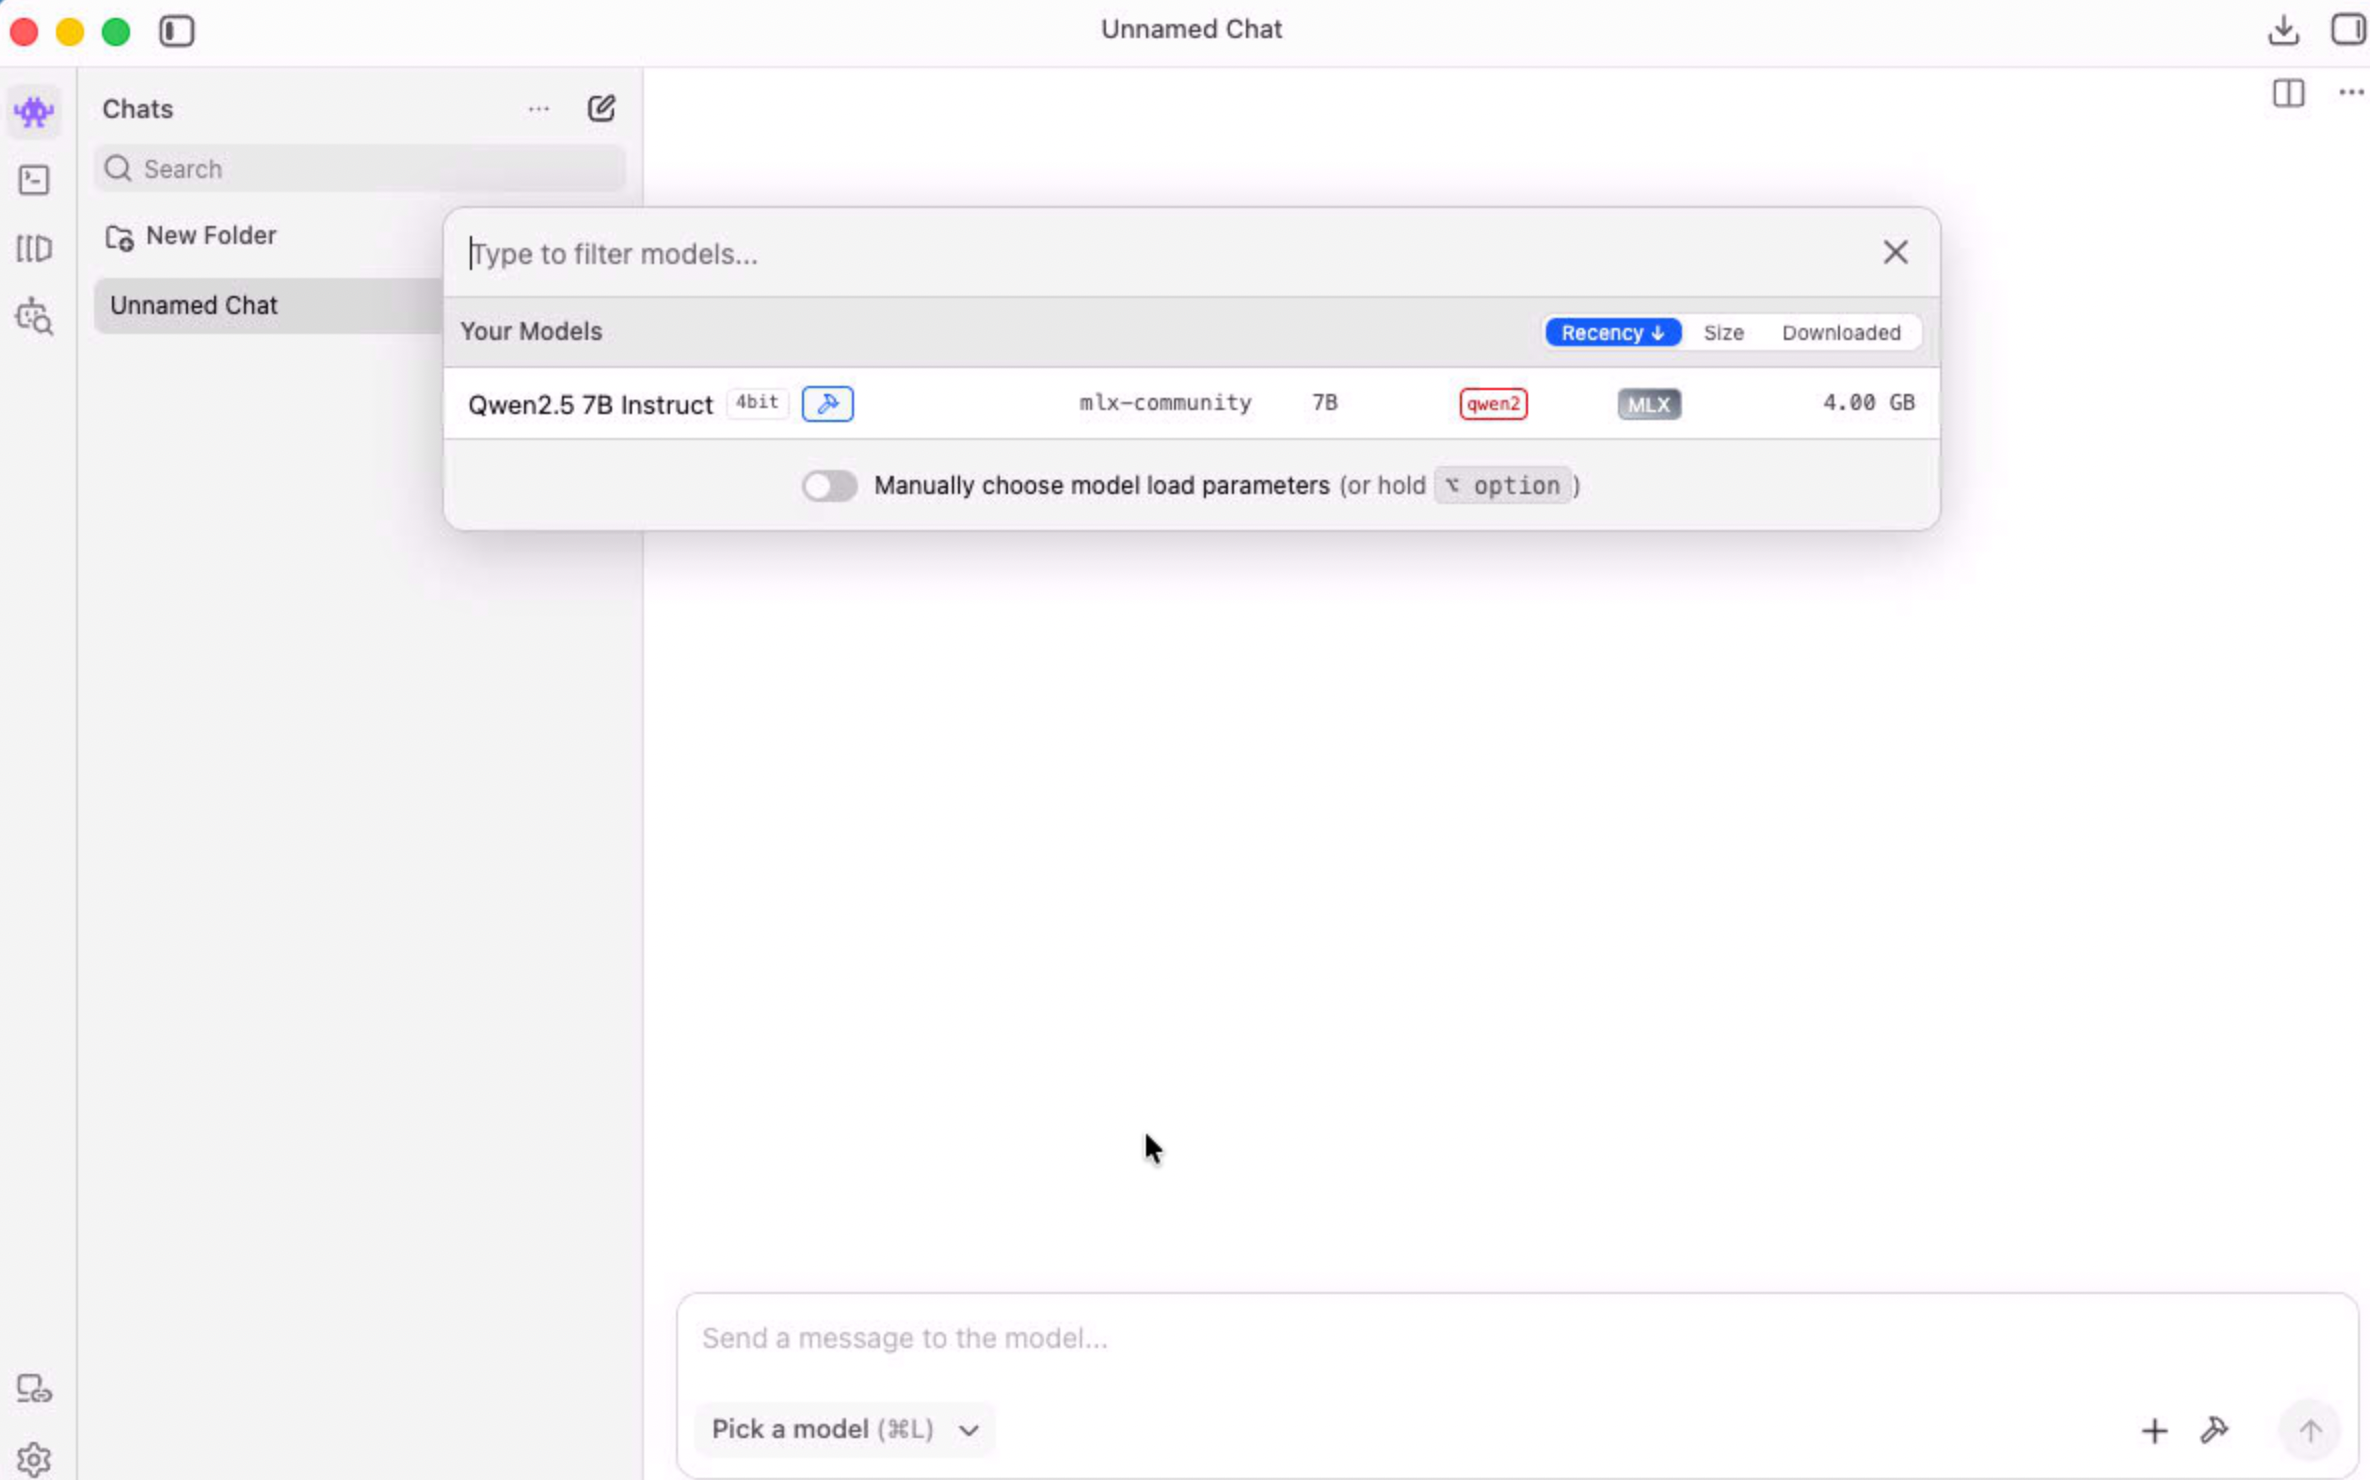
Open the Chat tab, the speech bubble icon in the sidebar. At the top of the window, a dropdown menu lets you load a model, select the one you just downloaded. LM Studio loads it into memory, a few seconds, and displays a familiar input field, a conversation, like any other assistant.
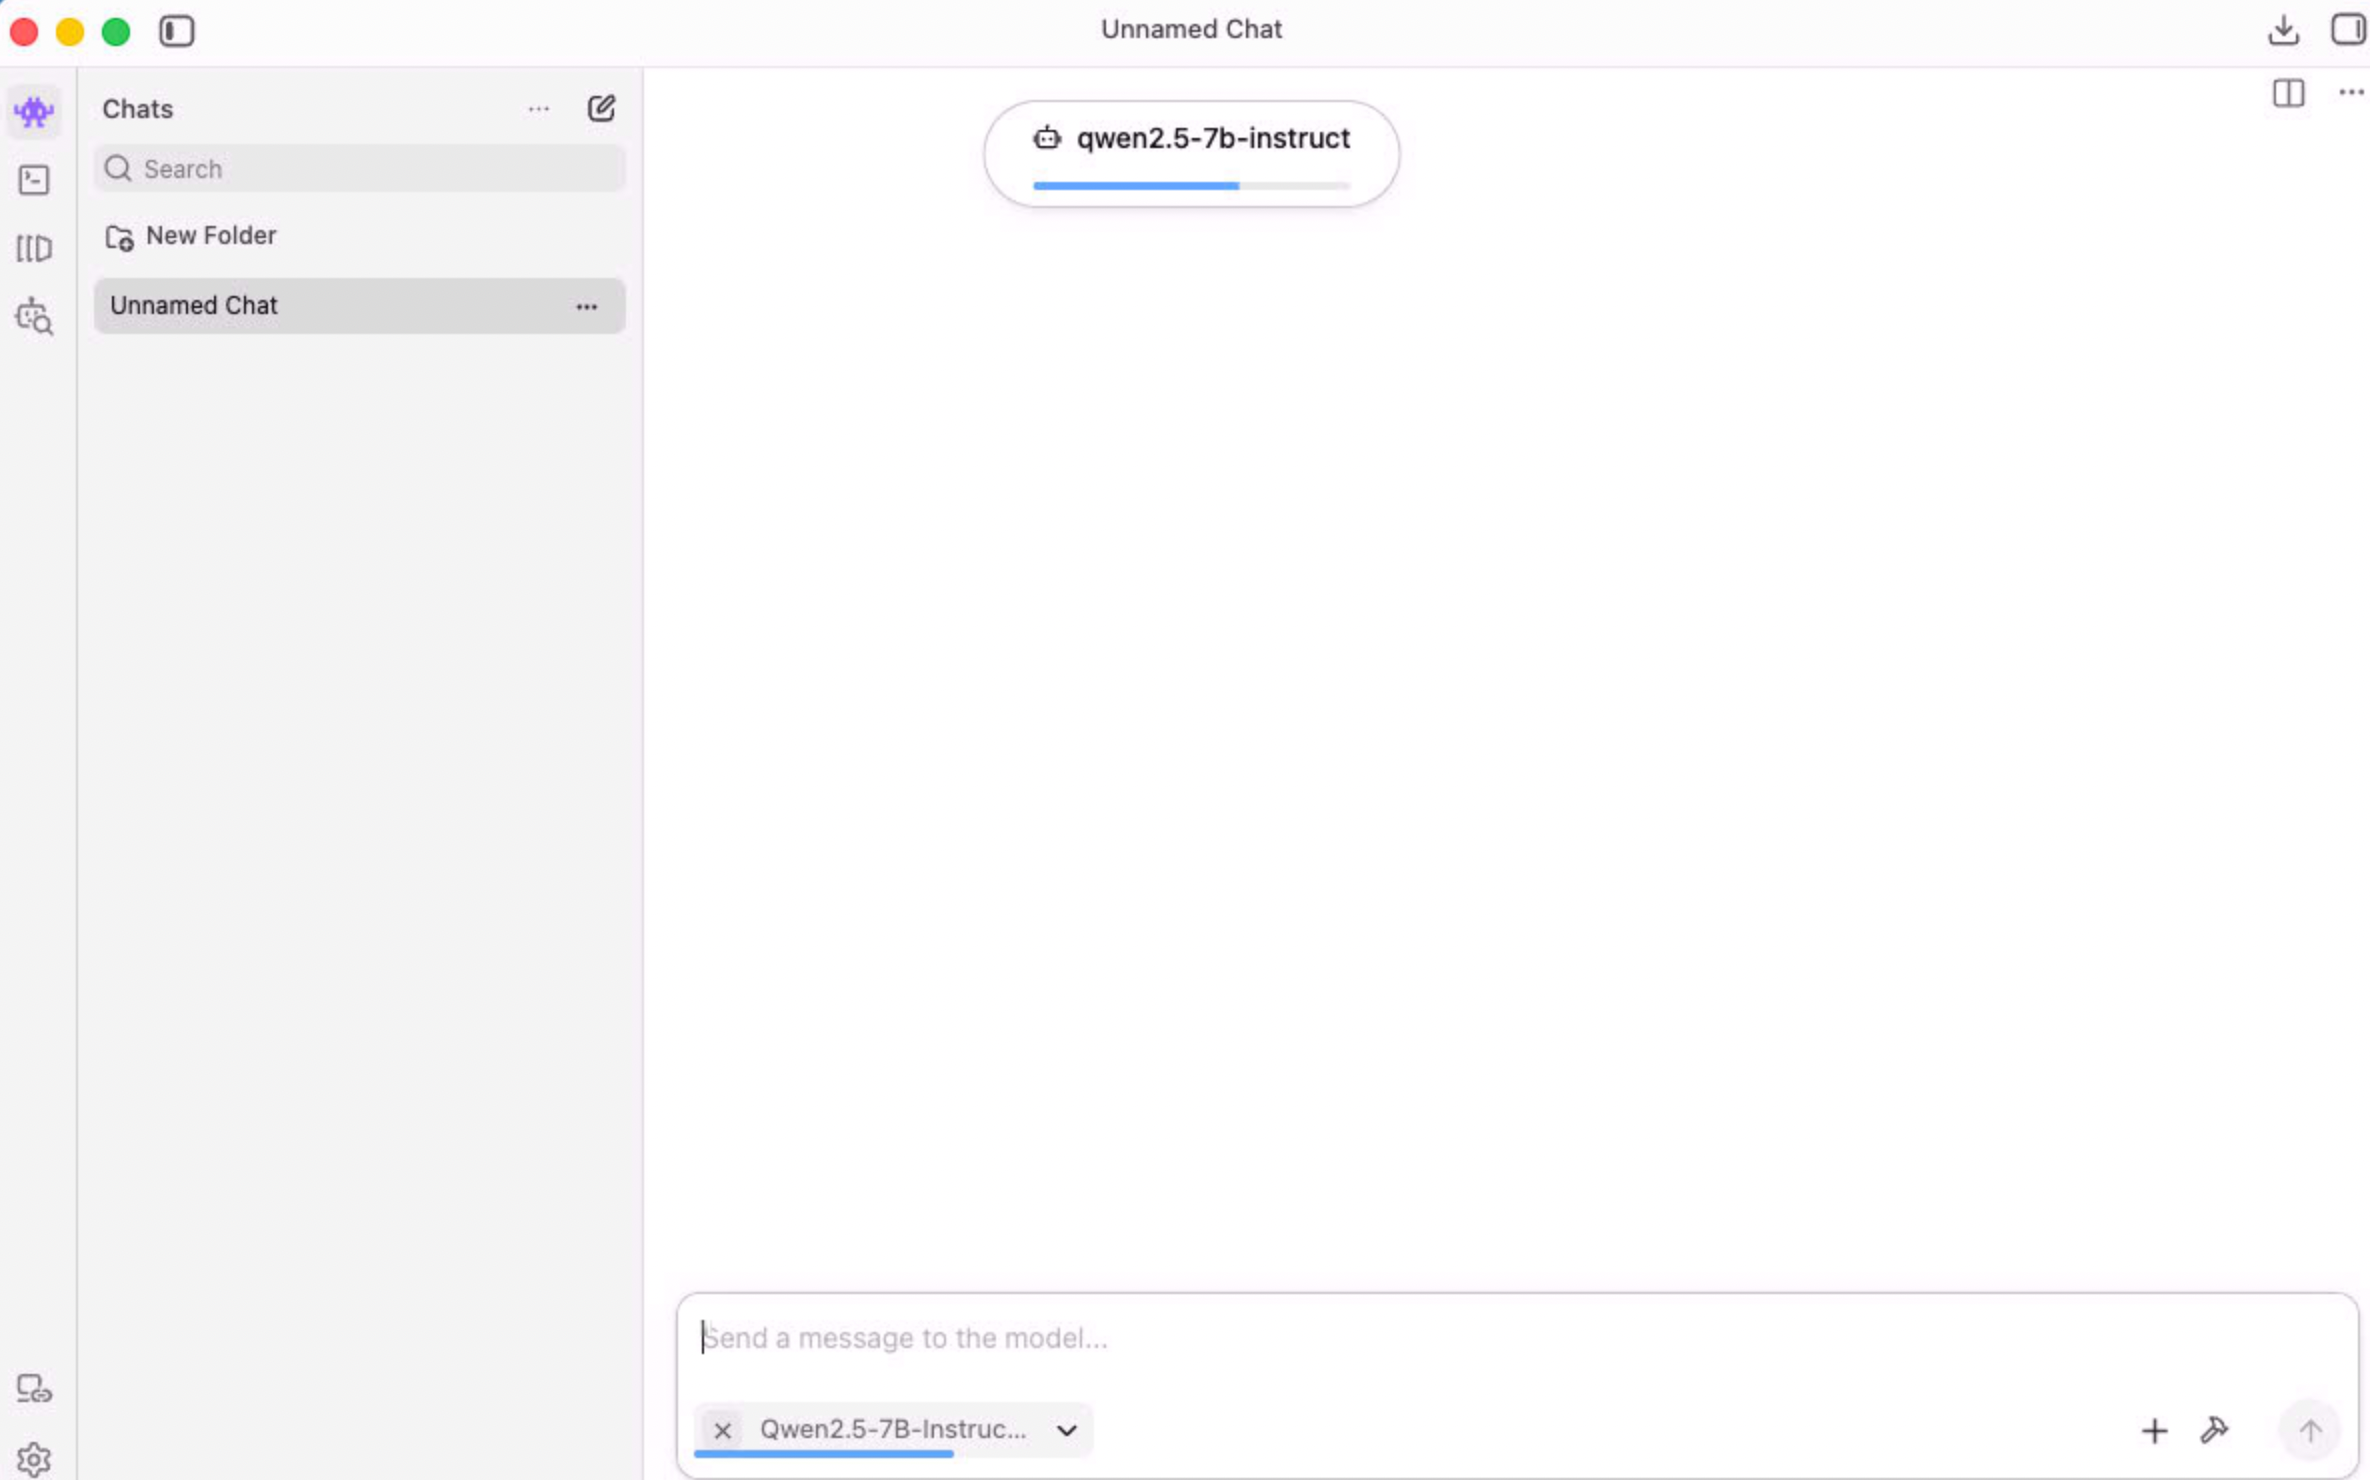
If LM Studio offers you a choice of engine, make sure it’s set to MLX. It’s usually automatic when you’ve picked an MLX variant, but a quick check doesn’t hurt.
Type your first prompt. Anything, preferably a real task, to feel what it’s like. “Summarize this text in three points”, “write a polite follow-up email”, “explain the difference between two concepts”. The model thinks for a few seconds, then responds, word by word, entirely from your machine.
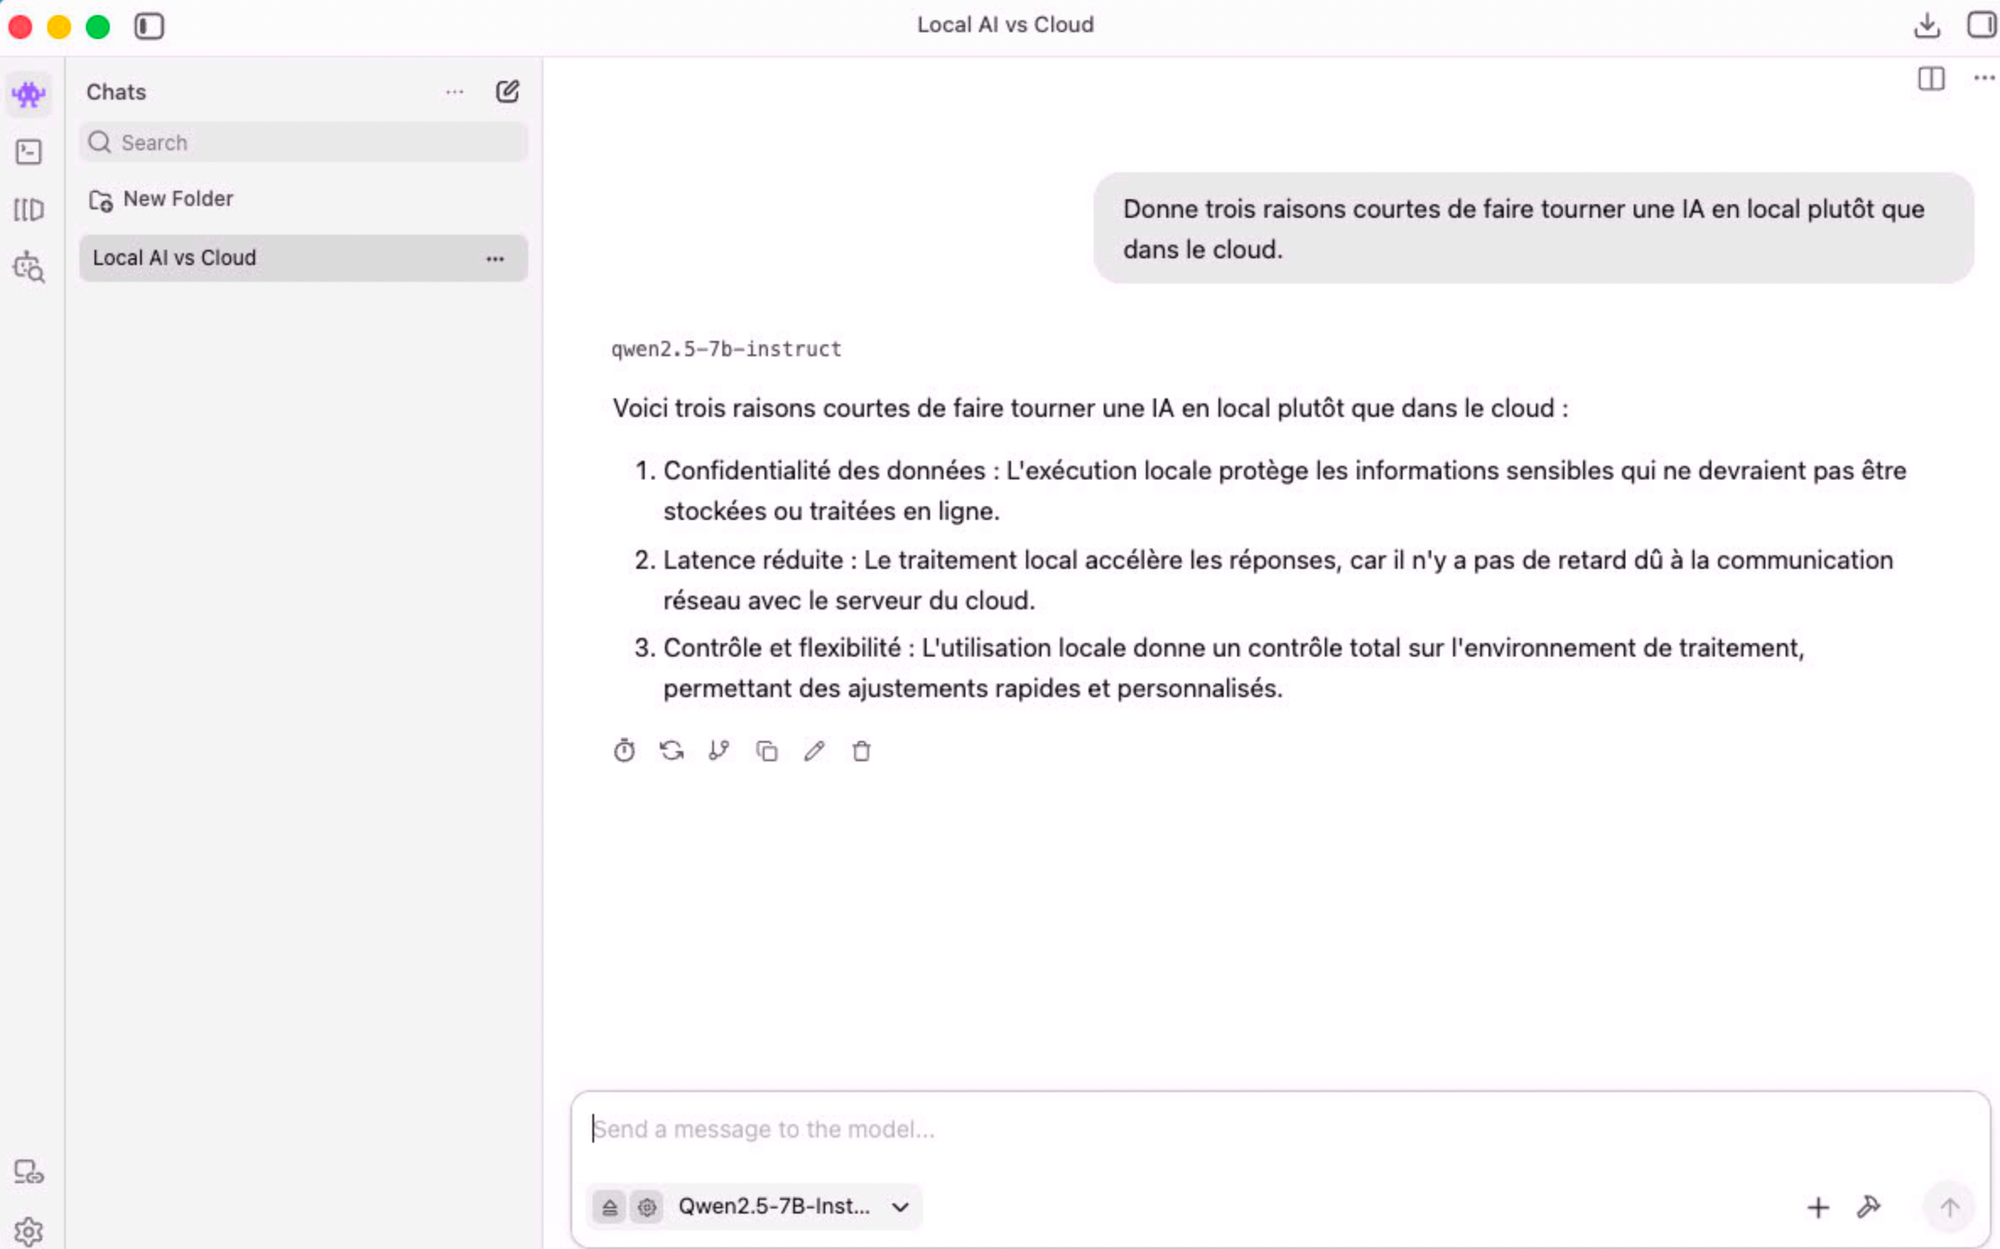
And now, the demonstration that wraps up the previous article’s loop.
Cut the Wi-Fi. Click on the Wi-Fi icon in your menu bar and turn it off, or go to System Preferences. Your machine is now offline, cut off from the internet, unplugged from the world. Ask the model another question.
It responds.
There you have it. No request went out, not a single byte of your text left your Mac, and yet it works. That’s what a model running on your machine looks like. When they turn off the distant tap one morning, that one keeps running. You can turn the Wi-Fi back on, the demonstration is made.
Three settings that make all the difference
Your model is running. Three buttons deserve a mention, because they make the difference between a smooth machine and a struggling one.
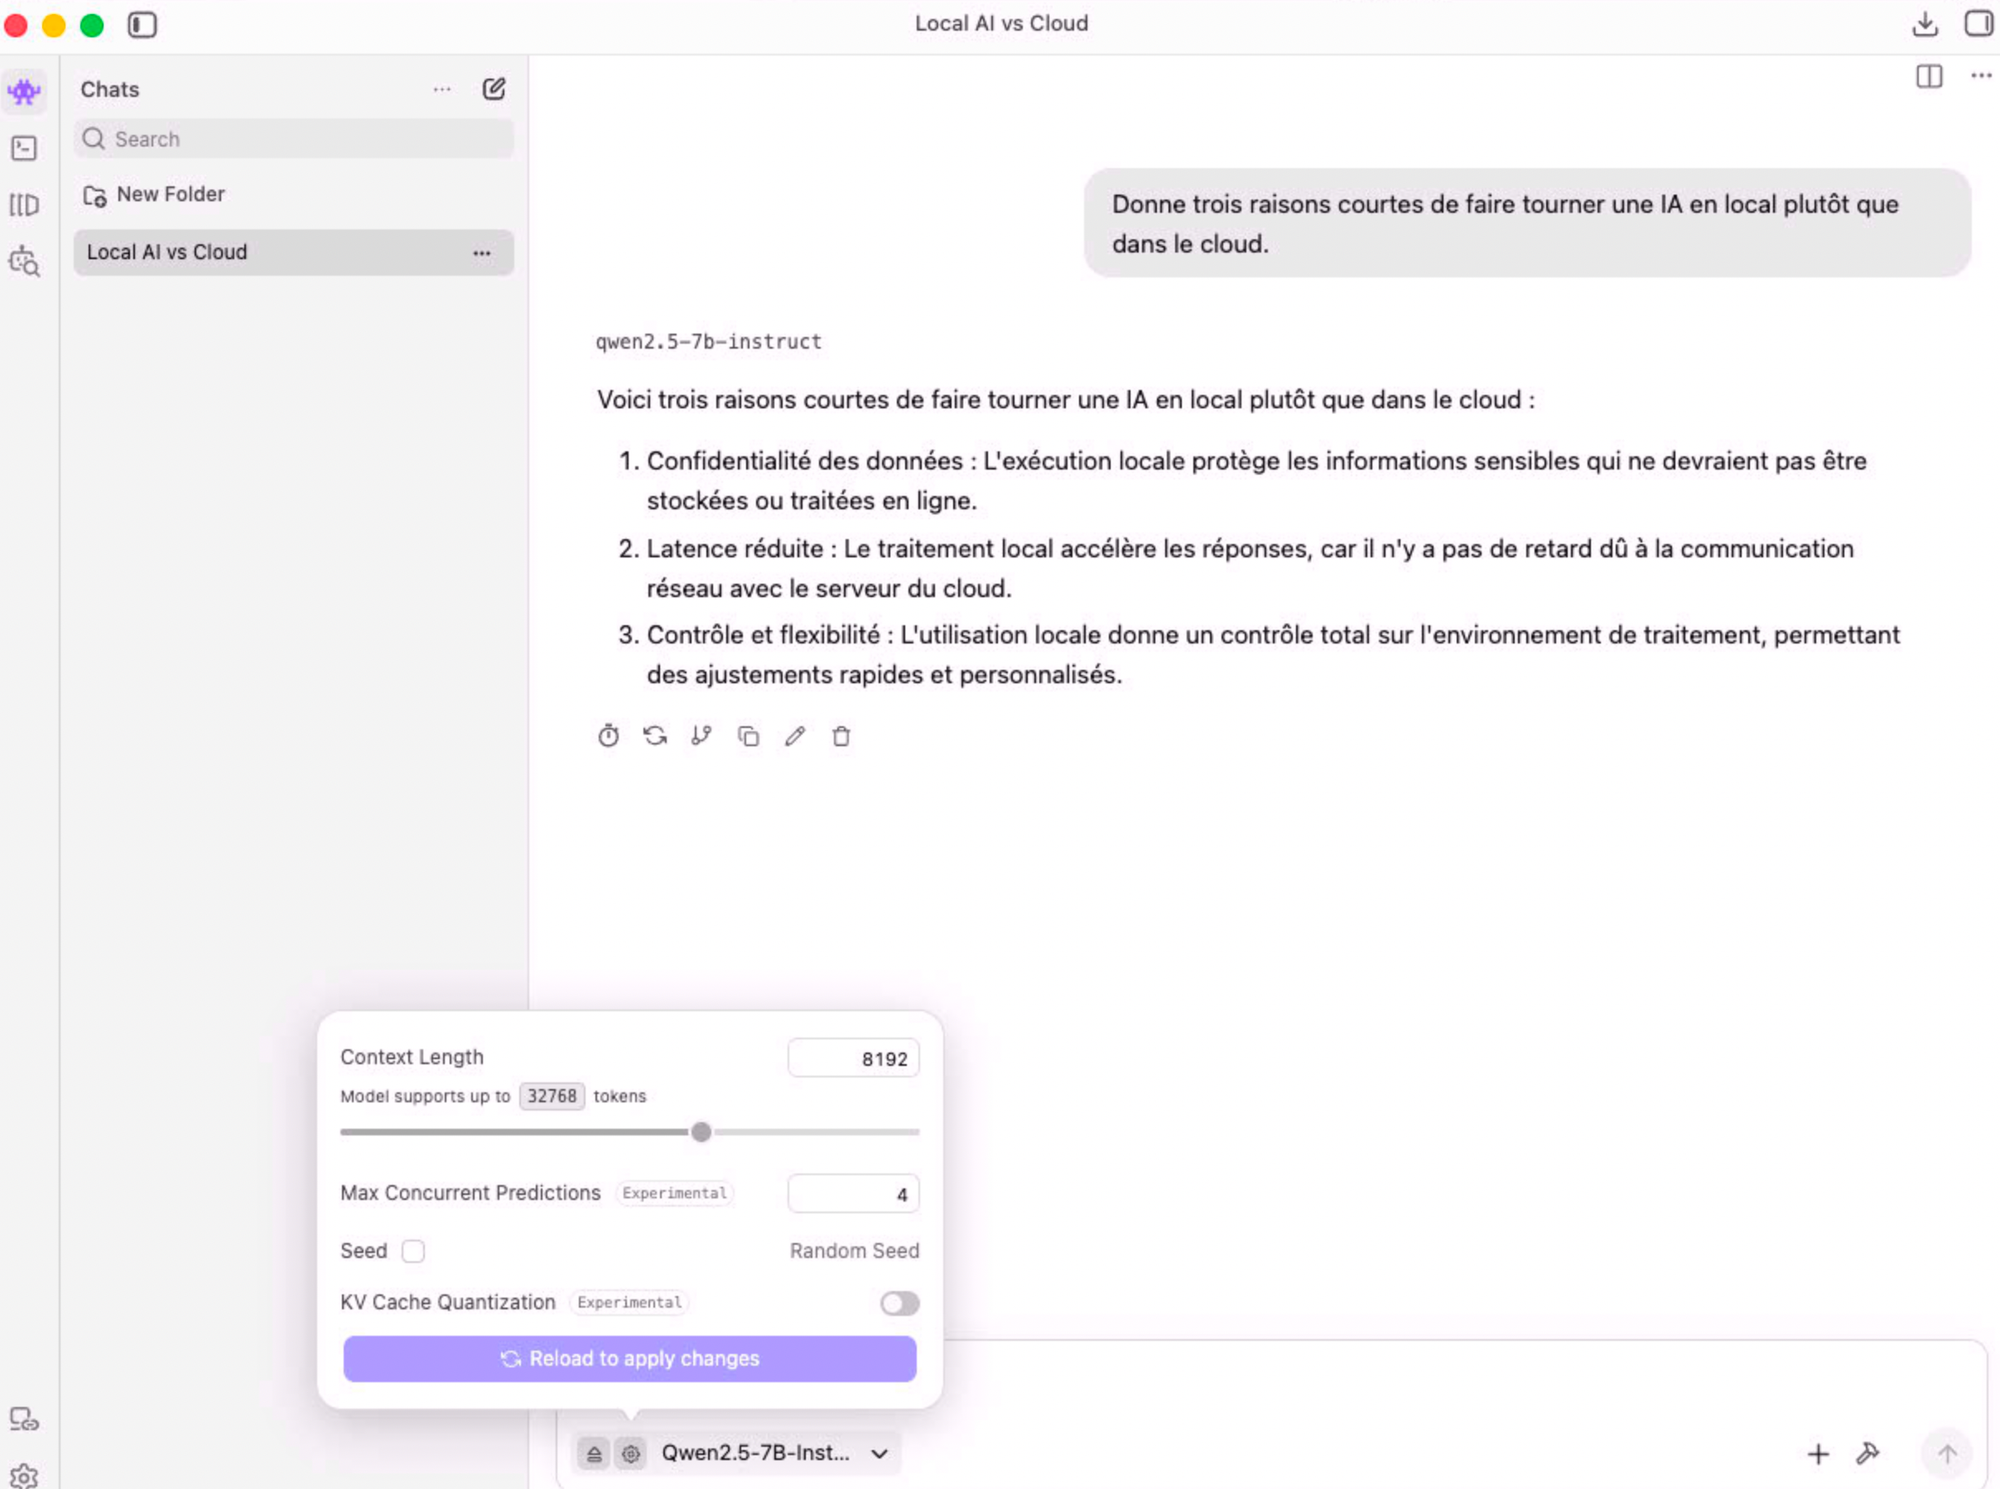
Context length. That’s how much text the model can keep in mind at once, your question plus its response plus everything you’ve fed it. It’s set when you load the model, expressed in tokens, in the config panel. A high value lets you feed it long documents, but it consumes RAM in proportion. If your Mac is struggling, lower it. If you want it to digest a long PDF, raise it, keeping an eye on your RAM.
Quantization. We talked about it when downloading, it’s the quality-versus-weight lever. If your model is cramped in your RAM, more aggressive quantization (Q4 instead of Q8) makes it fit. If you have room to spare and want the best response, lighter quantization improves quality. You adjust by downloading another variant of the model, that’s the only point where you have to go back through the download process.
Unload the model. As long as a model is loaded, it occupies your RAM, even if you’re not using it. When you’re done, unload it, the eject button in the model selector frees up RAM all at once. Useful habit if you’re switching to a heavy task, video editing, coding, virtual machine, and you want your gigabytes back. Closing the window isn’t always enough, unload explicitly.

Going further
You have a running model, you’ve passed your first offline prompt. The rest is bonus, for when the urge to dig deeper strikes.
Ollama, for the curious of the command line. If the command line doesn’t scare you, Ollama runs a model with a single command. You install the app, open the Terminal, type ollama run mistral-small:24b, and it downloads the model then puts you in conversation, directly in the terminal. It’s sparser than LM Studio, but ruthlessly effective, and it opens the door to automation, plugging a local model into your own scripts via a local API. Ollama also takes advantage of Apple Silicon by using MLX.
MLX in action, for the hungry. The engine LM Studio uses under the hood, MLX, is an Apple framework that you can pilot yourself, with its toolbox mlx-lm. It’s the playground for those who want to maximize their unified memory, test custom quantizations, or run barely-out models. Reserved for those who enjoy the fine mechanics, but that’s where you’ll find raw performance on a Mac.
For most everyday uses, you’ll never go beyond LM Studio, and that’s perfectly fine.
Wrap-up
What you’ve just done. You installed a free app, downloaded a model in MLX tailored to your RAM, passed a first prompt, and verified with Wi-Fi off that nothing was leaving your Mac. Twenty minutes, zero command line, zero dependency on a model that a third-party IA can shut down.
This model is yours. No one can cut it off, charge you per request, or decide one morning that your nationality doesn’t suit them. It won’t replace the best distant model for the toughest tasks, we said so, and that’s not the point. Its value is that it’s there, on your machine, all the time, for the bulk of what you do.
The base is set. Next up, using it for real, for all the tasks you can.
Read next: Put your local AI to work, no cloud
Sources
The tool
- LM Studio, the desktop app to run models locally, free, with MLX engine on Apple Silicon.
- LM Studio, system requirements, Apple Silicon M1 to M4 and macOS 14 or later, 16GB RAM recommended.
The models
- Qwen2.5 7B Instruct, MLX 4bit, 4.28GB, Apache 2.0 license, the pick for a 16GB Mac.
- Mistral Small 24B, MLX 4bit, around 13GB, Apache 2.0 license, the pick for a 32GB Mac.
Going further
- Ollama, run a model with a single command, with local API.
- Apple MLX, the framework optimized for Apple Silicon’s unified memory.
Technical terms? Check the glossary.